
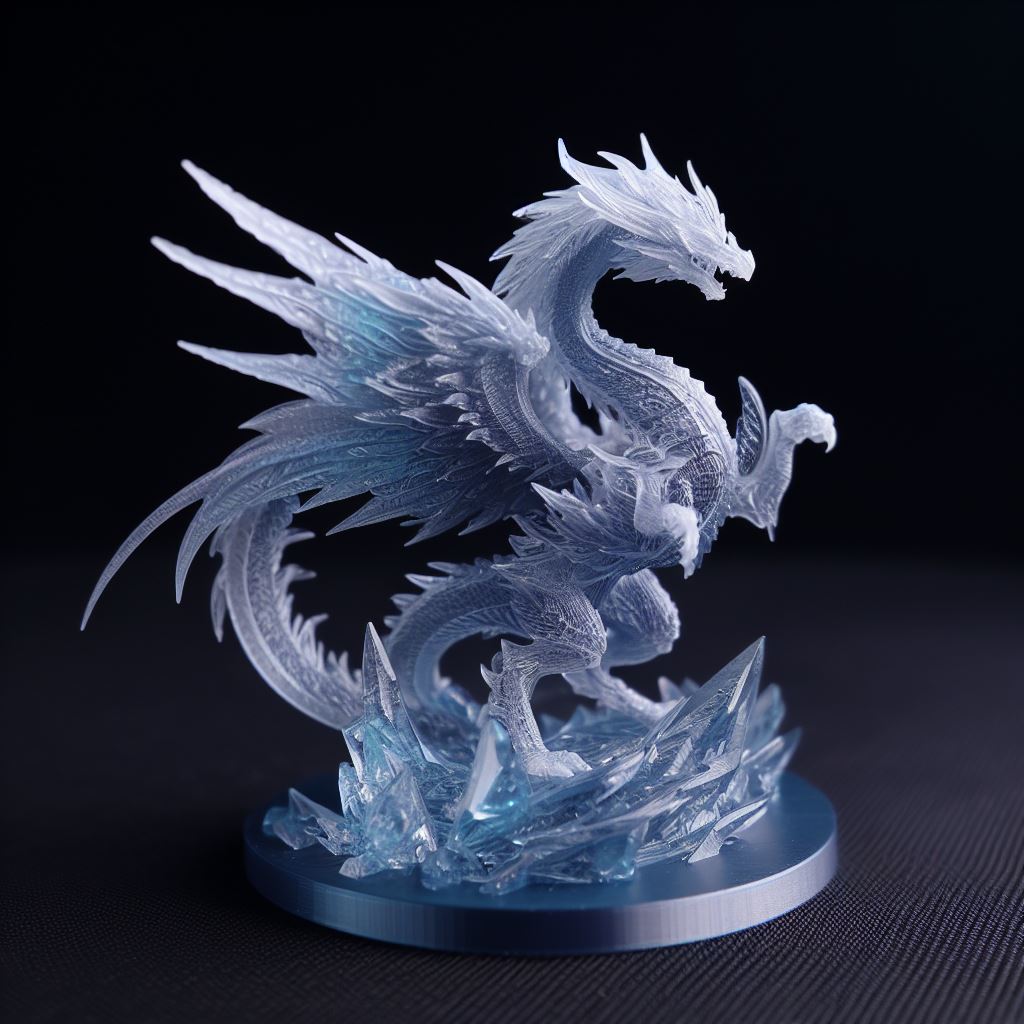
3D Printed Dragon Adventures and Troubleshooting Tips

3D Printed Dragon Adventures
Hey there, fellow 3D printing enthusiasts! Today, I’m excited to take you on an adventure through the fascinating world of 3D printing dragons. Whether you’re a seasoned maker or a beginner in the realm of additive manufacturing, this comprehensive tutorial will guide you step-by-step on how to design and print your very own 3D printed dragon. Let’s dive in!
I. Introduction to 3D Printed Dragon
Before we spread our creative wings and bring our dragon to life, let’s take a moment to understand the magic of 3D printing. 3D printing, also known as additive manufacturing, is a cutting-edge technology that allows us to transform digital designs into tangible objects layer by layer. From small trinkets to complex prototypes, 3D printing opens up a world of possibilities for makers, artists, and hobbyists.
Dragons, mythical creatures known for their majestic appearance and awe-inspiring presence, have captured human imagination for centuries. Combining the power of 3D printing with the allure of dragons, we can now turn our dreams into reality.
II. Choosing the Right 3D Printer and Materials
To begin our journey, we need a reliable 3D printer and the right materials. Various types of 3D printers are available, such as Fused Deposition Modeling (FDM) and Stereolithography (SLA). For this project, an FDM printer is recommended for its affordability and ease of use.
Creality Ender 3 Max Neo 3D Printer (FDM)

Pros:
- CR Touch Automatic Leveling: The CR Touch sensor automates bed leveling, improving efficiency and ease of use.
- Large Build Volume: The large build volume of 300300320 mm is ideal for large projects or multiple small prints simultaneously.
- Dual Z-Axis Precision: Dual Z-axes, timing belt, and dual motors ensure stability and high printing precision.
- Quiet Operation: A full-metal bowden extruder and 32-bit silent mainboard keep the noise under 50dB, making it suitable for quiet environments.
- Power Loss Recovery & Filament Sensor: These features enhance reliability by resuming prints after power loss and monitoring filament levels.
Cons:
- Lower Resolution Compared to Anycubic: May not match the extreme precision of the Anycubic.
- Weight: At 22.7 pounds, it’s slightly heavier than the Anycubic.
ANYCUBIC Photon Mono M5s 12K Resin 3D Printer (SLA)
Pros:
- High Resolution: The 10.1-inch 12K monochrome LCD screen with a resolution of 11520*5120 offers extremely high detail, down to 19 microns, making it ideal for intricate models.
- Leveling-Free: The leveling-free feature through floating platform technology and internal sensors makes setup easier and ensures consistent printing.
- Fast Printing: An average printing speed of 105mm/h, aided by high-speed resin and a high-speed release film, significantly reduces printing time.
- Intelligent Features: Automatic device checks, resin detection, and printing status detection improve the ease of use and success rate of prints.
- Upgraded Slicer Software: Intelligent Mode and a new support algorithm in the Anycubic Photon workshop 3.1 enhance printing stability and efficiency.
Cons:
- Weight and Size: Weighing 19.6 pounds with dimensions of 13.83″D x 13.83″W x 22″H, it may be bulky for some users.

Overall Comparison:
- The ANYCUBIC Photon Mono M5s stands out for its exceptional resolution and fast printing speed, making it ideal for users needing detailed prints quickly.
- The Creality Ender 3 Max Neo offers a larger build volume and quieter operation, appealing to users with diverse, large-scale printing needs.
- Both printers have intelligent features like filament sensors and power loss recovery, enhancing their usability and reliability.
Choosing the Right Material for 3D Printing
Selecting the appropriate material for 3D printing is crucial as it directly affects the print’s quality, durability, and functionality. Here’s a detailed look at some popular 3D printing materials, including a section on resin.
PLA (Polylactic Acid)
- Characteristics:
- Biodegradable: Made from renewable resources like corn starch or sugarcane, PLA is environmentally friendly.
- Easy to Print: Requires lower printing temperatures (around 180°C to 220°C) and doesn’t warp easily, making it suitable for beginners.
- Appearance: Offers a glossy finish and is available in a variety of colors.
- Applications:
- Ideal for non-functional prototypes, decorative items, and models that don’t require high heat resistance or strength.
- Limitations:
- Not suitable for objects exposed to high temperatures or requiring high strength.
ABS (Acrylonitrile Butadiene Styrene)
- Characteristics:
- Durable: Known for its toughness and impact resistance.
- Heat Resistant: Suitable for objects that may be exposed to higher temperatures.
- Flexibility: Slightly flexible, which prevents breaking under strain.
- Applications:
- Commonly used for functional prototypes, automotive parts, and toys.
- Limitations:
- Emits fumes during printing; requires a well-ventilated area.
- Requires a heated bed to prevent warping, making it more challenging for beginners.
PETG (Polyethylene Terephthalate Glycol)
- Characteristics:
- Applications:
- Ideal for functional parts that require strength and water resistance.
- Limitations:
- Can be sticky during printing, which might lead to clogging.
Resin for 3D Printers
- Types:
- Standard Resin: Offers fine details but is relatively brittle.
- Tough Resin: Designed to simulate the strength and stiffness of ABS.
- Flexible Resin: For parts that need to bend and compress.
- Castable Resin: Used in jewelry making for lost wax casting.
- Characteristics:
- High Resolution: Ideal for prints requiring fine details.
- Finish: Produces smooth surfaces and a high-quality finish.
- Post-Processing: Requires cleaning in alcohol and post-curing under UV light.
- Applications:
- Used in dentistry, jewelry making, and prototyping small, detailed parts.
- Limitations:
- More expensive than filament.
- Printers and resins can produce fumes, requiring good ventilation.
When selecting a material, consider the intended use of the printed object, your experience level, and the capabilities of your 3D printer. Each material has its unique properties and ideal use cases, and understanding these can greatly improve the outcome of your 3D printing projects.
III. Designing Your 3D Printed Dragon

Now comes the creative part – designing your 3D printed dragon! You have two options here: using a pre-existing 3D model or creating one from scratch.
Option 1: Using Pre-made 3D Printed Dragon Models
If you’re new to 3D modeling or simply want to save time on the design process, using pre-made dragon models is a fantastic way to kickstart your 3D printing journey. There’s a treasure trove of dragon designs available on various online platforms, catering to different styles and levels of complexity. Whether you prefer an elegant, majestic dragon or a fierce, formidable one, you’ll find a wide selection to suit your taste.
3D Dragon Models
Examples of platforms to find pre-made 3D dragon models include:
- Thingiverse: This popular platform hosts an extensive collection of 3D models, and you can find an abundance of dragon designs uploaded by fellow makers and artists. Browse through the offerings, filter by popularity or category, and find the perfect dragon to bring to life.
- MyMiniFactory: Known for its high-quality curated content, MyMiniFactory features a variety of professionally crafted dragon models, ensuring a seamless 3D printing experience. The models available here often come with detailed descriptions, allowing you to gauge their compatibility with your 3D printer.
- Cults3D: With its diverse range of 3D printable designs, Cults3D offers a rich assortment of dragons to spark your creativity. From intricate and detailed sculptures to stylized and whimsical creations, there’s something for every dragon enthusiast on this platform.
Before Downloading the 3D Dragon Model
Before downloading a pre-made dragon model, it’s essential to check a few critical points:
Confirm the model’s compatibility with your 3D printer’s specifications, including the build volume and nozzle size.
Ensure the model is available in a file format supported by your slicing software, such as STL or OBJ.
Verify whether the model is royalty-free or requires a license for commercial use, if applicable.
Once you’ve found the perfect dragon model, don’t hesitate to add your personal touch. Many pre-made models can be modified and customized to suit your preferences, so feel free to make adjustments to truly make the dragon your own. Whether you’re new to 3D printing or an experienced maker looking for inspiration, pre-made 3D models provide an excellent starting point for your dragon-printing adventure.
Option 2: Creating Your Own 3D Printed Dragon Model
Embarking on the exciting journey of creating your very own 3D printed dragon model allows you to unleash your imagination and artistic flair. To get started, you’ll need to choose a suitable 3D modeling software that aligns with your skill level and design preferences. Whether you opt for the beginner-friendly Tinkercad or the more advanced Blender, the process of bringing your dragon to life will be a rewarding experience. Follow the step-by-step tutorial below to craft a unique and captivating 3D dragon model:
Using Tinkercad:
- Create a New Design: Open Tinkercad and start a new design project.
- Build the Dragon’s Body: Utilize basic geometric shapes like cubes and spheres to create the main structure of the dragon’s body.
- Refine the Silhouette: Gradually refine the dragon’s silhouette by resizing and positioning the shapes to achieve the desired form.
- Add Details: Use additional shapes and tools to add details such as wings, claws, and facial features.
- Experiment and Iterate: Don’t hesitate to experiment with different shapes and arrangements to achieve a unique and captivating design.
- Group and Align: Group the different elements of your dragon together and ensure proper alignment for a cohesive model.
- Finalize the Design: Review your dragon model and make any necessary adjustments to ensure it meets your creative vision.
Using Blender:
- Import a Reference Image: Start by importing a reference image of a dragon into Blender. This will serve as your guide throughout the sculpting process.
- Sculpt the Dragon’s Form: Utilize Blender’s sculpting tools to mold the dragon’s body, carefully adding layers of detail to achieve a lifelike appearance.
- Refine Details: Pay close attention to the dragon’s features, such as scales, horns, and tail, as you continue to refine the model.
- Texture Painting: Use Blender’s texture painting capabilities to add color and texture to the dragon’s body, further enhancing its realism.
- Test Render: Perform a test render to see how your dragon looks in a 3D environment, making any necessary tweaks to optimize the final result.
- Export as STL: Once satisfied with your dragon model, export it as an STL file, the format required for 3D printing.
IV. Preparing the 3D Model for Printing
Transforming your 3D dragon design into a physical model involves several critical steps. Each step ensures the final print meets quality and accuracy standards. Here’s a guide to prepare your model for 3D printing.
Step 1: Mesh Repair and Optimization
- Identifying Mesh Issues:
- Non-Manifold Edges: These are edges that don’t belong to exactly two faces, leading to printing errors.
- Holes in the Mesh: Gaps in the mesh can cause incomplete prints.
- Overlapping Faces: These can confuse the printer about which areas to fill.
- Solutions:
- Mesh Repair Software: Tools like Meshmixer or Netfabb can automatically repair these issues.
- Optimization: Reducing the polygon count without losing detail can speed up slicing and printing.
Step 2: Slicing the Model
- What is Slicing?
- Slicing converts your 3D model into a series of layers and generates the G-code that instructs the printer.
- Setting Adjustments:
- Layer Height: Determines the print’s resolution. Lower heights result in finer details but longer print times.
- Infill Density: Affects the print’s strength and material usage. Higher density for structural parts, lower for decorative.
- Print Speed: Balancing speed with quality is crucial. Faster printing can reduce quality.
- Support Structures: For overhanging parts of your dragon, supports are necessary. They hold the model during printing but require removal afterwards.
Step 3: Printing the First Layers
- Importance of the First Layers:
- The first few layers are foundational for the rest of the print. Poor adhesion can lead to warping or complete print failure.
- Achieving Perfect First Layers:
- Bed Leveling: Ensure the printing bed is perfectly level. An uneven bed leads to poor adhesion.
- Calibration: Calibrate the printer for accurate layer heights and extrusion rates.
- Adhesion Aids: Using a raft or brim can greatly improve adhesion for the first layers, especially for large or complex models like a dragon.
- Temperature Control:
- Ensure the bed and extruder are at the right temperatures for your chosen material.
V. 3D Printing Your Dragon

The excitement builds as you’re about to bring your dragon design to life through 3D printing. This process requires attention to detail and precision to ensure the best outcome. Let’s break down the steps to make your 3D printed dragon a reality.
Step 1: Load the Filament
Loading the filament correctly is vital for a successful print. Here’s how to do it:
- Choose the Right Filament: Depending on the desired qualities of your dragon (strength, flexibility, color, etc.), select the appropriate filament type (PLA, ABS, PETG, etc.).
- Insert the Filament: Follow your printer’s instructions to load the filament. Usually, this involves feeding the filament through a guide tube into the extruder.
- Ensure Proper Feeding:
- Smooth Insertion: The filament should feed smoothly into the extruder. Any resistance might indicate a clog or misalignment.
- Snug Fit: Make sure the filament is not too loose or too tight. An improper fit can lead to feeding problems during printing.
- Heating the Nozzle: Preheat the extruder to the recommended temperature for your filament. This ensures that the filament melts and flows correctly.
- Purge Old Filament: If there was a previous filament in the extruder, let some of the new filament flow through to purge any remnants of the old material.
Additional Considerations:
- Moisture-Free Filament: Ensure that the filament is dry. Moisture can cause printing defects. If necessary, dry the filament before use.
- Tangle-Free Spool: Make sure the filament spool is free of tangles to avoid feeding interruptions.
- Clean Nozzle: A clean nozzle is crucial for a smooth flow of filament. Check for any debris or previous material residue and clean if needed.
Step 2: Start Printing
Initiating the 3D printing process of your dragon design is a thrilling moment. This step involves transforming your virtual model into a tangible object. Let’s go through how to start printing and what to monitor during this process.
Initiating the Print
- Load the G-Code: Import the G-code file, created during the slicing phase, into your 3D printer. This code instructs the printer on how to create your model.
- Begin Printing: Use your printer’s interface to start the printing process. The printer will heat up to the required temperatures for the bed and the extruder.
Monitoring the Print
- First Layer Observation: The first few layers are crucial. Ensure they are laying down correctly and evenly. Good adhesion to the bed is key to prevent warping.
- Consistent Monitoring:
- Look for Warping or Misalignment: These issues can compromise the entire print. Warping usually happens on the corners of the print.
- Watch for Nozzle Clogs: A clogged nozzle can interrupt filament flow, leading to incomplete prints.
- Check for Stringing: If you see thin strings of plastic between parts of your dragon, you may need to adjust retraction settings.
Being Prepared to Intervene
- Pause or Stop if Necessary: If you notice significant issues, don’t hesitate to pause or stop the print. Addressing problems early can save time and materials.
- Adjust Settings if Needed: For example, if the first layer isn’t sticking, you might need to adjust the bed temperature or re-level the bed.
Safety Precautions
- Stay Nearby: Especially for long prints, check in regularly to ensure everything is going smoothly.
- Fire Safety: Have a fire extinguisher or fire safety equipment nearby as a precaution.
Post-Printing Steps
- Cool Down: Allow the print to cool down before removing it from the bed. Removing a print too early can lead to warping.
- Print Removal: Use a spatula or a similar tool to gently remove the print from the bed.
Step 3: Post-Processing
After the 3D printer has finished its job, it’s time to transition to the post-processing phase. This stage is where your 3D printed dragon transforms from a rough print into a polished piece of art. Let’s dive into the steps involved in post-processing.
Cooling Down
- Why It’s Important: Allowing your print to cool down gradually is vital. Rapid temperature changes can lead to warping or cracks, especially in larger or more detailed prints like a dragon.
- Timeframe: The cooling time varies depending on the size and complexity of the print. For a dragon, it might take a significant amount of time for a complete cool down.
- Tip: Don’t rush this process. Patience here can mean the difference between a successful print and a damaged one.
Removing the Print
- Tools You’ll Need: Prepare a putty knife, scraper, or similar tool. Some printers come with a tool specifically designed for print removal.
- Technique: Gently slide the tool under the edge of the print. Apply steady, even pressure to lift the print. If your printer has a flexible build plate, you can bend it to help pop the print off.
- Caution: Be careful not to apply too much force, which can damage the print or the build plate. Wear gloves to protect your hands.
Potential Challenges
- Stuck Prints: If the print is stubbornly adhered to the bed, try gently heating the bed to loosen it.
- Delicate Parts: For parts of the dragon that are thin or fragile, be extra careful. Work slowly and steadily around these areas.
Post-Removal Steps
- Trimming and Sanding: Use small cutters or sandpaper to remove any excess filament or support material. Be particularly attentive to areas like the dragon’s wings or claws, where support material might be more prevalent.
- Filling and Smoothing: If there are gaps or layer lines, you can use a filler (like wood filler or putty) and then sand it smooth. This step is especially important if you plan to paint your dragon.
- Cleaning: Wipe down the model to remove any dust from sanding or residue from the print bed.
Final Thoughts
Post-processing is an essential part of 3D printing, especially for intricate models like a dragon. It’s where the print truly comes to life, transforming from a simple plastic form into a detailed and polished piece. By following these steps and taking your time, you can ensure that your 3D printed dragon is as magnificent as intended.
Step 4: Fine-Tuning (Optional)
At this stage, your 3D printed dragon has taken physical form, but there’s an opportunity to elevate its appearance and quality through fine-tuning. This step is optional and largely depends on the level of detail and finish you desire for your dragon model. Below are some techniques to refine your print.
Sanding for Smoothness
- Purpose: Sanding helps remove layer lines and minor imperfections, resulting in a smoother surface.
- Tools Needed: Use a range of sandpapers from coarse (for initial smoothing) to fine grit (for finishing touches).
- Method:
- Start with a coarser grit to remove larger imperfections.
- Gradually move to finer grit sandpapers to achieve a smooth finish.
- Be gentle around detailed areas like the dragon’s claws, wings, or face to avoid losing details.
Adding Details
- Carving Tools: For adding fine details or correcting small errors, precision carving tools can be used.
- Customization: This is an opportunity to add unique touches like scales, textures, or other intricate details to your dragon.
Applying Filler Primer
- Purpose: Filler primer helps fill in small gaps and provides a smooth base for painting.
- Application:
- Apply a thin coat of filler primer evenly over the dragon.
- Allow it to dry completely as per the manufacturer’s instructions.
- Lightly sand the surface after the primer dries for an ultra-smooth finish.
Painting Your Dragon
- Base Coat: Start with a base coat to ensure uniform color application.
- Detailing: Use smaller brushes for detailed areas like the eyes or teeth.
- Sealing: After the paint has dried, apply a clear sealant to protect the paint and add a desired finish (matte, satin, or glossy).
Additional Tips
- Patience: Fine-tuning is a delicate process that requires patience. Don’t rush to avoid damaging your model.
- Safety: When sanding or applying primer, work in a well-ventilated area and consider wearing a mask to avoid inhaling particles.
- Testing on Scrap Pieces: If unsure about a technique or material, test it on a scrap piece of printed material first.
Fine-tuning is about adding your personal touch to the dragon, transforming it from a simple print into a work of art. Whether it’s smoothing the surface, adding detailed textures, or painting, each step contributes to making your dragon uniquely yours.
By following these steps diligently, you can ensure a successful 3D printing experience for your dragon model. Remember, each print is a learning opportunity, and don’t hesitate to experiment and iterate on your designs to achieve the best results
VI. Troubleshooting and Helpful Tips for 3D Printing

3D printing is a complex process that sometimes leads to unexpected challenges. Understanding how to troubleshoot these issues is crucial for successful printing. Below are some common problems encountered during 3D printing, along with helpful tips and solutions.
1. Print Warping
- Causes and Solutions:
- Bed Adhesion: Poor adhesion can cause the corners of the print to lift. Ensure the print bed is clean and level. Use adhesives like glue sticks or hairspray for better grip.
- Heated Bed: If your printer has a heated bed, use it. Adjust the temperature to suit the material (e.g., higher for ABS).
- Environmental Factors: Avoid drafts or sudden temperature changes around the printer.
2. Layer Adhesion Problems
- Causes and Solutions:
- Temperature Settings: Incorrect extruder or bed temperature can lead to poor layer bonding. Adjust the temperature according to the filament type.
- Print Speed: Printing too fast can prevent proper layer adhesion. Slow down the print speed to allow layers to bond effectively.
- Filament Quality: Ensure the filament is dry and of good quality. Moisture in filament can affect layer adhesion.
3. Stringing and Oozing
- Causes and Solutions:
- Retraction Settings: Enable retraction in your slicing software. This action pulls the filament back when the nozzle moves between print areas.
- Travel Speed: Increase the travel speed so the nozzle moves quickly between sections, reducing stringing.
- Printing Temperature: Lower the temperature to reduce the likelihood of oozing filament.
4. Insufficient Infill
- Understanding Infill:
- Infill Density: Adjust the infill percentage based on the required strength and weight of the object. Higher infill means stronger but heavier prints.
- Infill Pattern: Choose the right infill pattern for your needs. Some patterns offer more strength or flexibility.
5. Printing Imperfections
- Solutions for Smoother Finish:
- Sanding: Carefully sand the print to remove imperfections. Start with coarse sandpaper and gradually move to finer grits.
- Filler Primers: Applying a filler primer can smooth out the surface and prepare it for painting.
- Layer Height: Adjusting the layer height can help. Lower layer heights yield smoother prints but take longer to print.
Additional Tips
- Regular Maintenance: Regularly check and maintain your printer for consistent performance.
- Test Prints: Before starting a large project, run test prints to check settings.
- Community Forums: Utilize online forums and communities for specific advice and shared experiences.
By understanding these common issues and their solutions, you can greatly improve the quality and success rate of your 3D prints. Remember, patience and experimentation are key in the world of 3D printing.
VII. Conclusion
Congratulations on completing this exhilarating 3D printing adventure and crafting your very own 3D printed dragon! Through this journey, you’ve not only mastered the art of 3D printing but also unleashed your creativity to breathe life into a mythical creature.
Remember, 3D printing is an ever-evolving realm, so keep experimenting, learning, and exploring new designs. Embrace the freedom of creation that 3D printing offers and let your imagination soar beyond the realms of ordinary.
VIII. FAQs
- Can I use different filament types for my 3D dragon?
Absolutely! While PLA is a popular choice, feel free to experiment with other materials like ABS, PETG, or even specialty filaments like wood or metal-infused PLA. - How long does it take to a 3D printed dragon?
The printing time depends on the size, complexity, and settings of your 3D model. A small dragon might take a few hours, while a larger one could take a day or more. - Can I scale the dragon model to different sizes?
Yes, you can scale the model according to your preferences. However, keep in mind that extreme scaling may affect the print quality. - Do I need a 3D pen for post-processing?
While a 3D pen can be helpful for small touch-ups, it’s not necessary. Sanding, painting, and other traditional methods can also yield excellent results. - Where can I find inspiration for dragon designs?
Draw inspiration from mythology, movies, video games, and various artwork. Remember to add your own unique touches to create a one-of-a-kind dragon!
Happy 3D printing, and may your dragons soar to new heights of imagination and wonder!
Resources
- https://cults3d.com/en
- https://www.myminifactory.com
- https://www.thingiverse.com/
- https://www.tinkercad.com/
- https://www.blender.org/
- meshmixer.com


