
3D Printed Headphone Stand: Transform Your Desk with Custom Creations

1. Introduction
In today’s innovative landscape, the advent of 3D printing has transformed our approach to personalizing our living and workspaces. At the forefront of this revolution is the 3D printed headphone stand, a fusion of functionality and creativity. These stands not only safeguard our prized headphones but also inject a dose of personality into our desks or studios. For music lovers, avid gamers, or anyone who values tidy spaces, a 3D printed headphone stand is an indispensable accessory.
2. Why Opt for a 3D Printed Headphone Stand?
In the realm of personalization and functionality, a 3D printed headphone stand stands as a beacon of creativity and practicality. This unique accessory not only serves as a safe haven for your headphones but also as a testament to the wonders of 3D printing technology. Let’s dive into the reasons why choosing a 3D printed headphone stand can be a game-changer for your workspace or gaming setup.
Customization: Unleashing Your Creativity
The allure of 3D printing a headphone stand lies in the boundless customization it offers. Imagine having a stand that’s not just another generic accessory but a piece of art that reflects your personality, style, or the aesthetics of your gaming rig. The possibilities are endless:
- Design Freedom: Whether it’s a stand shaped like your favorite superhero, a piece that complements the sleekness of your setup, or something that simply stands out, 3D printing makes it possible. You’re no longer limited to what’s available in stores; if you can envision it, you can probably create it.
- Personal Touch: Adding elements that reflect your interests, such as your gamer tag, favorite game logos, or even LED lighting for an extra flair, can make your headphone stand one-of-a-kind.
- Tailored to Fit: Different headphones come in various sizes and weights. Designing your stand means you can tailor its dimensions precisely to your headphone’s specifications, ensuring a perfect fit and preventing any chance of damage.
Accessibility: Bringing Ideas to Life
The notion that 3D printing is reserved for the tech-savvy and the elite is a thing of the past. The democratization of 3D printing technology has opened the doors for enthusiasts at all skill levels to bring their ideas to life:
- User-Friendly Design Software: With platforms like TinkerCAD and Fusion 360, anyone with a computer can start designing within minutes. These tools offer intuitive interfaces and comprehensive tutorials, making 3D design accessible to beginners.
- Availability of 3D Printers: The proliferation of affordable 3D printers has made this technology accessible to a broader audience. From compact, budget-friendly models perfect for home use to more sophisticated machines for intricate designs, there’s a 3D printer for every need and budget.
- Community Support: The 3D printing community is vibrant and supportive, offering advice, sharing designs, and providing feedback to help beginners navigate their first projects with confidence.
Cost-Effectiveness: A Budget-Friendly Alternative
In contrast to the often high-priced, store-bought headphone stands, opting for a 3D printed version can be significantly more economical:
- Low Material Costs: The raw materials for 3D printing, such as PLA or ABS filament, are relatively inexpensive, especially when considering the small amount required for a headphone stand. This low cost of entry makes 3D printing a highly attractive option for those looking to save without sacrificing quality.
- Energy Efficiency: Modern 3D printers are designed to be energy-efficient, keeping operational costs low. This efficiency, combined with the low material costs, means you can create a custom headphone stand for a fraction of the price of retail options.
- No Waste: By designing and printing a stand tailored to your specific needs, you avoid the waste associated with mass-produced items that may not perfectly fit your requirements or taste.
3. Designing Your 3D Printed Headphone Stand
Embarking on the journey to design a 3D printed headphone stand brings a blend of creativity and technicality. The process allows you to mold a concept into a tangible accessory that’s not only practical but also a reflection of your personal style. Let’s dive into the essentials of designing a stand that stands out, focusing on the choice of design software and key design considerations.
Choosing the Right Design Software
The foundation of any great 3D printed headphone stand is a solid design, facilitated by the right software. Your choice of tool can significantly influence the design process, affecting everything from the complexity of designs you can create to the ease with which you can bring your ideas to life.
- For Beginners: TinkerCAD
- What It Offers: TinkerCAD is a free, online 3D design app aimed at beginners. Its user-friendly interface and straightforward tools make it an excellent starting point for those new to 3D modeling.
- Why It’s Ideal: With TinkerCAD, you can quickly learn the basics of 3D design through interactive lessons. It’s perfect for designing simple, yet stylish headphone stands without the need for advanced technical skills.
- For Advanced Users: Fusion 360
- What It Offers: Fusion 360 is a more advanced, cloud-based 3D CAD, CAM, and CAE tool that caters to more complex project requirements. It offers a comprehensive set of features for design, engineering, and manufacturing.
- Why It’s Ideal: If you’re aiming to design a headphone stand with intricate details, customizable parts, or specific mechanical properties, Fusion 360 provides the necessary tools and flexibility to realize your vision.
Design Tips for Your Headphone Stand
Creating a 3D printed headphone stand that’s both functional and aesthetically pleasing requires thoughtful consideration of various design aspects. Here are some tips to guide you through the design process:
- Prioritize Stability
- Ensure the base of your stand is wide and heavy enough to support your headphones without tipping over.
- Consider using a weighted base or a design that distributes weight evenly for added stability.
- Consider Aesthetics
- Think about how the stand will fit into your existing space. Does it complement your desk setup or gaming rig?
- Play with shapes and forms. Aesthetic appeal can be as important as functionality. Whether you prefer sleek lines or more organic shapes, your stand should be a reflection of your style.
- Account for Size and Fit
- Measure your headphones to ensure the stand is appropriately sized. It should hold your headphones comfortably without stretching them out or letting them hang too loosely.
- Consider the height of the stand. Your headphones should be easy to pick up and place back on the stand without any strain.
- Design for Durability
- Select areas of the design that will bear most of the weight or stress and reinforce them accordingly.
- If your design includes moving parts or modular components, ensure they are robust enough to withstand regular use.
- Incorporate Functional Features
- Think beyond just holding headphones. Can your stand also serve as a cable holder, or perhaps integrate USB ports for charging?
- Design with convenience in mind. Features that enhance the usability of your stand will make it even more valuable.
4. Selecting the Material for Your 3D Printed Headphone Stand
The choice of material for your 3D printed headphone stand is not just about aesthetics; it impacts the durability, functionality, and overall success of your project. With the evolution of 3D printing technology, there’s a wide range of materials available, each offering distinct advantages and considerations. Let’s delve deeper into the most commonly used materials for 3D printed headphone stands: PLA, ABS, and PETG.
PLA (Polylactic Acid)
PLA is the go-to material for many 3D printing enthusiasts, especially those just starting out. Its popularity is largely due to several key attributes:
- Beginner-Friendly: PLA’s ease of use makes it ideal for those new to 3D printing. It prints at lower temperatures and does not require a heated bed, making it compatible with most 3D printers.
- Eco-Friendly: Being derived from renewable resources like cornstarch, PLA is biodegradable under industrial composting conditions, offering an environmentally friendly option.
- Aesthetic Variety: Available in a wide range of colors and finishes, including translucent, glow-in-the-dark, and even wood-filled varieties, PLA allows for considerable creativity in the design of your headphone stand.
- Considerations: While PLA is versatile and easy to use, its lower heat resistance can be a drawback. Exposure to high temperatures (such as in a car during summer) can lead to warping or deformation.
ABS (Acrylonitrile Butadiene Styrene)
For those seeking more durability and heat resistance in their headphone stand, ABS is a strong contender:
- Durability: ABS is known for its toughness and resistance to physical impacts, making it suitable for objects that will be handled frequently or may experience wear and tear.
- Heat Resistance: Compared to PLA, ABS can withstand higher temperatures without losing its shape, making it suitable for environments with fluctuating temperatures.
- Printing Requirements: ABS requires higher extrusion temperatures and a heated print bed to prevent warping, which may limit its use to 3D printers equipped with these features.
- Considerations: The printing process of ABS can emit unpleasant odors and may require good ventilation. Additionally, achieving a smooth finish with ABS might require additional steps like acetone vapor smoothing.
PETG (Polyethylene Terephthalate Glycol)
PETG offers a middle ground between PLA and ABS, combining ease of use with enhanced physical properties:
- Strength and Durability: PETG is stronger and more flexible than PLA, making it less prone to breaking under stress.
- Temperature and Chemical Resistance: It offers better heat resistance than PLA and is also resistant to moisture and various chemicals, ensuring longevity and durability of the headphone stand.
- Ease of Printing: While PETG can be slightly more challenging to print than PLA due to its stickiness, it does not require a heated bed and prints at temperatures comparable to ABS.
- Considerations: PETG’s stringing or oozing during printing can be a drawback, requiring fine-tuning of printer settings for optimal results.
5. Printing Your 3D Printed Headphone Stand
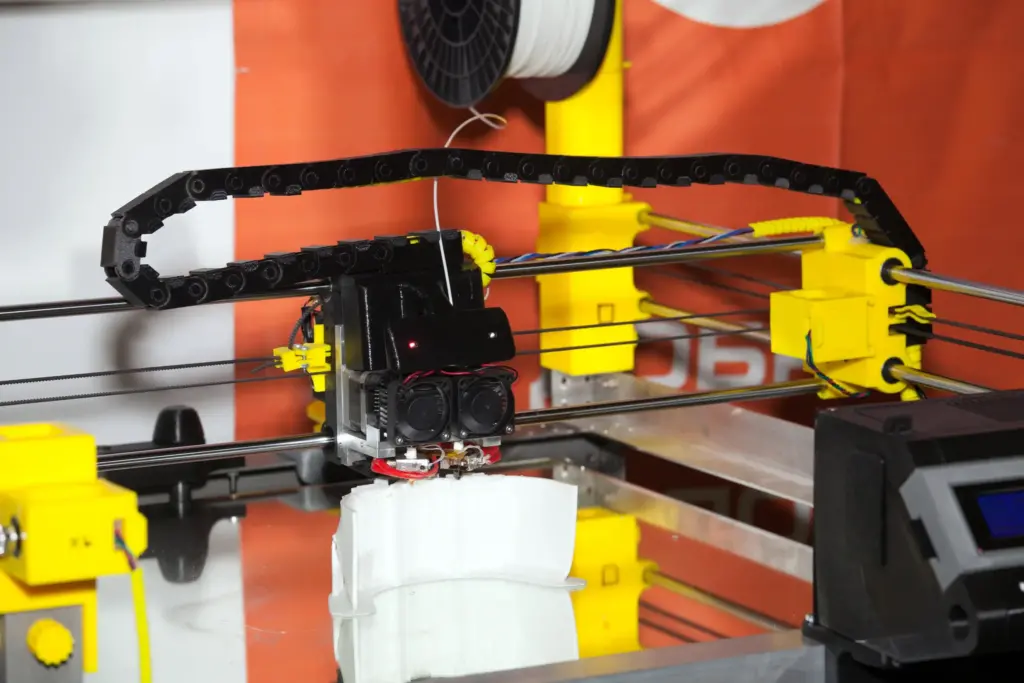
The process of bringing your 3D printed headphone stand to life is both exciting and intricate. Proper preparation and understanding of your 3D printer’s settings are paramount to ensure the final product is both aesthetically pleasing and structurally sound. Here’s a detailed guide to help you through the printing process, ensuring optimal results.
Setting Up Your 3D Printer
Before diving into the printing process, setting up your 3D printer correctly is crucial for achieving the best quality print. Here are the key steps to ensure your printer is ready:
- Level the Print Bed: An uneven print bed can lead to adhesion problems, resulting in warping or even failed prints. Make sure the bed is level and at the right initial distance from the nozzle.
- Set the Correct Nozzle Temperature: Different materials melt at different temperatures. Refer to your material’s guidelines for the optimal nozzle temperature to ensure smooth extrusion and strong layer bonding.
- Adjust Bed Temperature: For materials like ABS and PETG, a heated bed helps prevent warping. PLA usually doesn’t require a heated bed, but a slight increase in bed temperature can improve adhesion.
- Check for Clean Extrusion: Before starting your print, ensure the filament is feeding smoothly through the nozzle without any clogs or hiccups.
Printing Tips for a Successful Headphone Stand
Now that your 3D printer is set up, following these printing tips will help you achieve a high-quality headphone stand:
- Use a Raft or Brim for Better Adhesion:
- Raft: A raft lays down a thick network of material beneath your print, enhancing adhesion and providing a stable base. It’s particularly useful for designs with a narrow base.
- Brim: A brim adds extra lines of material around the base of your object without going underneath it, expanding the footprint and helping with adhesion without the extra material of a raft.
- Consider Print Speed:
- Slower print speeds can lead to a more detailed and smoother finish. For intricate designs or parts that require high accuracy, reducing the speed can make a significant difference.
- Conversely, for larger, less detailed sections, increasing the speed can save time without sacrificing quality.
- Monitor the First Few Layers:
- The initial layers are foundational for the rest of your print. Watching the first few layers can help you catch any issues early on, such as poor adhesion or incorrect nozzle height.
- If you notice issues, don’t hesitate to stop the print and recalibrate. It’s better to waste a small amount of material than to continue with a print that might fail.
After the Print Begins
- Regular Monitoring: While it’s not necessary to watch the printer every second, regular check-ins can help catch any potential issues early, such as filament tangles or shifts in the print.
- Environmental Factors: Keep your printing area free from drafts or sudden temperature changes, as these can affect print quality and lead to warping or layer misalignment.
6. Post-Processing Your 3D Printed Headphone Stand
Once the printing process of your 3D printed headphone stand is complete, the journey isn’t over yet. Post-processing can transform your print from a simple 3D object into a polished, professional-looking product. This stage is crucial for enhancing the aesthetic appeal and durability of your headphone stand. Let’s explore the steps to take your 3D printed headphone stand to the next level.
Sanding for Smoothness
Sanding is one of the first and most essential steps in post-processing. It helps in achieving a smooth finish and removing any imperfections or print lines, giving your headphone stand a higher quality feel.
- Start with Coarse Grit: Begin with a lower grit sandpaper (e.g., 120 grit) to remove larger imperfections. Be gentle to avoid removing more material than necessary.
- Progress to Finer Grits: Gradually move to higher grit sandpapers (e.g., 200, then 400 or higher). Each step should make the surface smoother and ready for painting if desired.
- Wet Sanding Option: For an even smoother finish, consider wet sanding with very high grit sandpaper. This method can help minimize dust and achieve a glossy surface.
Painting: Adding Color and Personality
Painting your 3D printed headphone stand can add a unique touch, making it truly one-of-a-kind. Whether you’re going for a sleek, single-color look or intricate designs, the right painting technique can make all the difference.
- Primer First: Apply a primer specifically designed for the type of material you’ve printed with. Primer helps the paint adhere better and provides a more uniform color.
- Choose Your Paint: Acrylic paints are a popular choice for their ease of use and quick drying times. Spray paints can also provide a smooth, even coat.
- Top Coat for Protection: After the paint has dried, apply a clear sealant or top coat to protect the paint from chips, scratches, and wear. This step also adds a professional touch to the finish.
Assembly: Bringing Pieces Together
Some headphone stand designs feature multiple parts that need to be assembled post-printing. Proper assembly is key to ensuring the stand is stable and durable.
- Test Fit First: Before applying any adhesive, do a dry run by fitting the pieces together. This step ensures all parts align correctly and helps plan where to apply glue.
- Selecting the Right Adhesive: Use a strong, durable adhesive that’s suitable for your material. Super glue (cyanoacrylate) works well for many plastics, but epoxy resins can offer even stronger bonds for heavier loads.
- Clamping: For parts that need to be held together tightly as the adhesive sets, consider using clamps or tape to maintain pressure and alignment.
Final Touches
- Protective Pads: Adding small rubber or felt pads to the bottom of your stand can prevent slipping and protect your desk’s surface.
- Cable Management Features: If your design doesn’t already include it, consider adding features such as hooks or channels to manage headphone cables.
7. Maintaining Your 3D Printed Headphone Stand
A 3D printed headphone stand can be a stylish and functional addition to any desk or entertainment setup. However, like any accessory, it requires some care to maintain its appearance and functionality over time. Here are comprehensive tips to ensure your 3D printed headphone stand remains in top condition.
Regular Cleaning
Dust and dirt can accumulate on your headphone stand, detracting from its appearance and potentially affecting its functionality. Here’s how to keep it clean:
- Use a Soft Brush: Gently remove dust from crevices and intricate designs with a soft-bristled brush. Makeup brushes or paintbrushes are excellent tools for this.
- Microfiber Cloths: For the stand’s larger surfaces, a dry microfiber cloth can pick up dust without scratching the material.
- Mild Cleaning Solutions: If your stand needs more than just dusting, use a mild soap solution and a soft cloth. Avoid harsh chemicals, as they can damage the finish or material of your stand.
Protecting from Sunlight and Heat
Prolonged exposure to direct sunlight can cause some materials used in 3D printing, like PLA, to warp or fade. Here’s how to prevent damage:
- Strategic Placement: Keep your headphone stand in a place where it’s not exposed to direct sunlight for extended periods.
- Heat Sources: Similarly, keep it away from other sources of heat, such as radiators or computer exhausts, which can also cause warping or deformation.
Addressing Wear and Tear
Over time, parts of your headphone stand may become loose or show signs of wear. Here’s how to address these issues:
- Tightening Loose Parts: If your stand was assembled from multiple pieces, check the joints periodically and tighten any screws or reapply adhesive where necessary.
- Repairing Minor Damage: Small cracks or breaks can often be repaired with a bit of super glue. For best results, apply the glue sparingly and hold the pieces together until the adhesive sets.
- Refreshing the Finish: If the stand’s appearance becomes dull or if it starts to show scratches, consider sanding and repainting it following the post-processing steps previously outlined.
Regular Inspections
- Check for Stress: Periodically inspect your stand for signs of stress, especially if it holds heavy headphones. Look for bending, cracking, or discoloration that might indicate the material is under too much strain.
- Component Integrity: For stands with moving parts or adjustable features, ensure these components operate smoothly and securely.
Preventative Measures
- Avoid Overloading: Don’t hang more weight on the stand than it was designed to support. This includes using it to hold additional items beyond headphones.
- Use Protective Coatings: Consider applying a UV protective spray if the stand is in a bright area, or a protective coating to resist scratches and wear.
8. Where to Find 3D Models for Your Headphone Stand
Not everyone wants to design their headphone stand from scratch, and thankfully, there are vast repositories of 3D models available online:
- Thingiverse: Thingiverse is a treasure trove for 3D printing enthusiasts, offering a plethora of free models, including a wide variety of headphone stands. Whether you’re looking for something simple and minimalist or more intricate and thematic, Thingiverse likely has a model to suit your taste.
- MyMiniFactory: Another fantastic resource is MyMiniFactory, where artists and designers share their creations. While some models are free, others support the creators through purchase. This site often features more polished and unique designs, providing an excellent selection for those looking to add an artistic touch to their space.
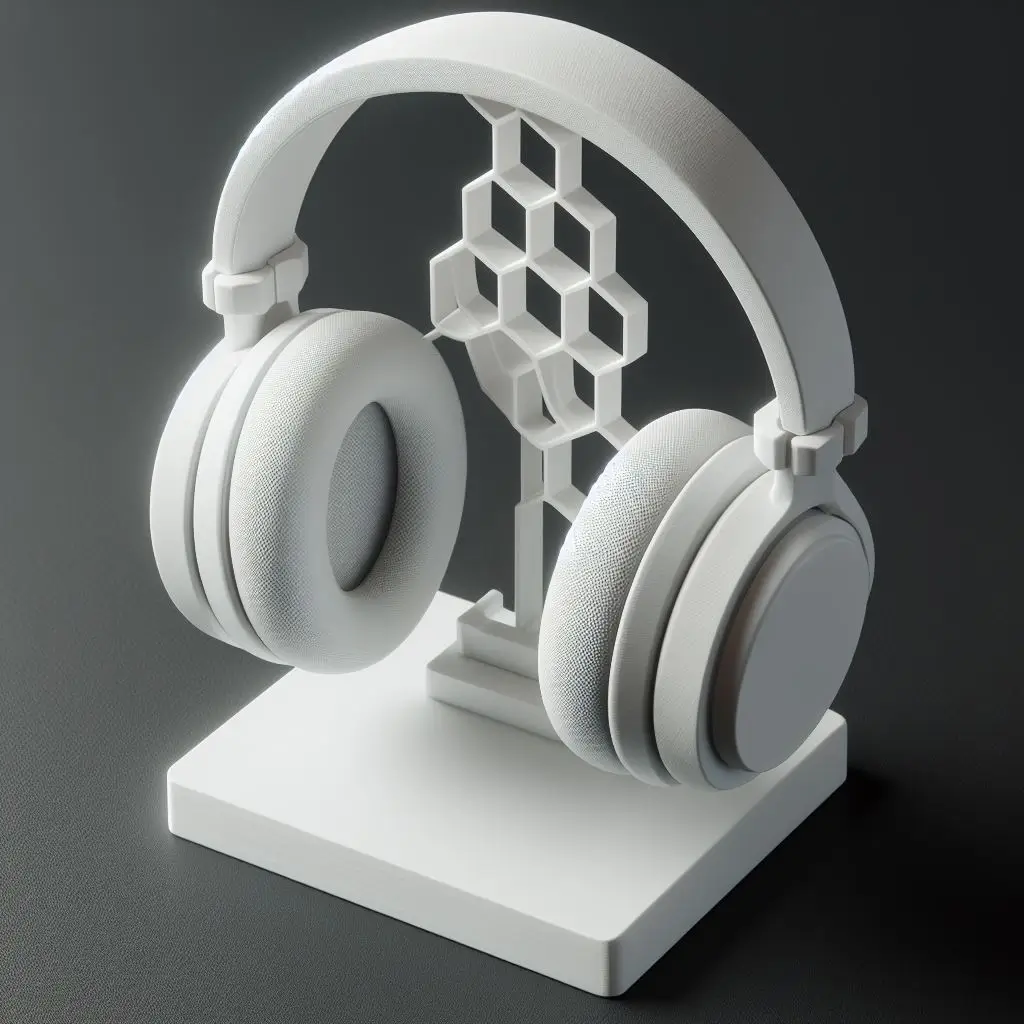
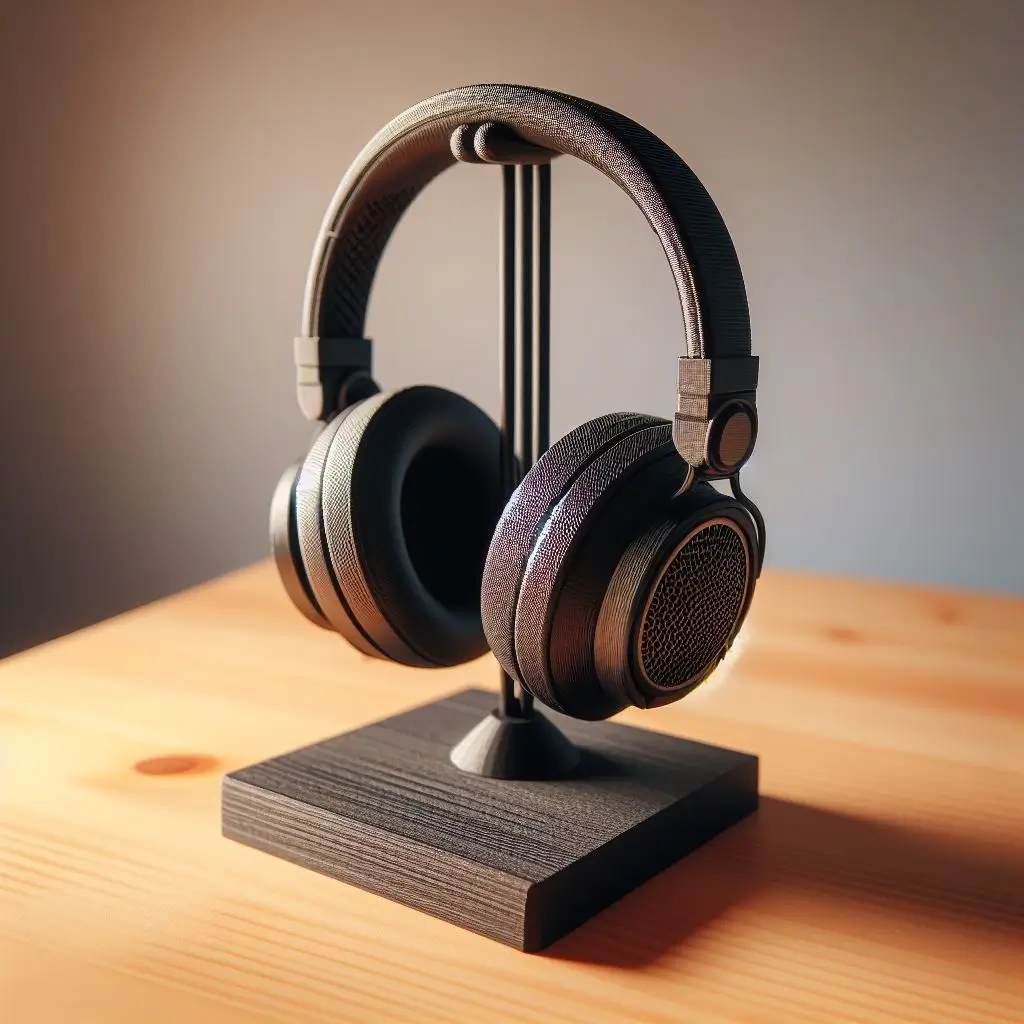
9. Showcase of 3D Printed Headphone Stands

To inspire your own creation, let’s highlight a few types of stands that exemplify the range of possibilities with 3D printing:
- The Minimalist: Sleek and simple, this stand focuses on functionality and clean lines. It’s perfect for those who love a modern aesthetic.
- The Functional: This design incorporates additional features such as cable management, a holder for USB drives, or even a docking station for your phone. It’s ideal for those who value utility and want to maximize desk space.
- The Artistic: For those who see their headphone stand as a piece of art, this category includes stands shaped like famous statues, abstract forms, or themed to match specific hobbies or interests. It’s a conversation starter and a reflection of personal style.
10. Conclusion
Embarking on the journey of creating a 3D printed headphone stand not only offers a functional accessory for your workspace but also provides a platform to express creativity and personalize your environment. The process from design to post-processing can be incredibly rewarding, culminating in a product that’s uniquely yours. Whether you’re new to 3D printing or an experienced maker, the creation of a headphone stand is a project that demonstrates the beauty and utility of this technology.
11. FAQs
- Can I print a headphone stand if I don’t own a 3D printer?
Yes, there are many services online where you can upload your design, and they’ll print and ship the final product to you. - What is the best material for a headphone stand?
PLA is great for most users due to its ease of use and finish. However, if you need more durability or heat resistance, consider ABS or PETG. - How long does it take to print a headphone stand?
The printing time can vary widely depending on the complexity and size of the design. Simple designs might take a few hours, while more complex ones could require over 24 hours. - Can I sell 3D printed headphone stands?
Yes, but make sure you have the rights to the designs you’re selling. Some designers allow their models to be used commercially, while others do not. - Are there any legal considerations with 3D printing headphone stands?
When using someone else’s design, always check the license agreement. Respect copyright laws and the designer’s wishes regarding the use and distribution of their work.
Resources


