
Things to Make with a 3D Pen: Transform Your Ideas into Spectacular 3D Art!

1. Introduction
Hey there, creative souls! Ever caught yourself marveling at those viral videos showcasing dazzling three-dimensional art made with something that looks a lot like a pen? That’s a 3D pen, a fantastic tool that lets your drawings literally stand off the page into the air! In this guide, we’re diving deep into the exciting world of 3D pens—what you can create with them, and how to get started on this thrilling artistic journey.
What is a 3D Pen?
A 3D pen is like a handheld 3D printer. It uses plastic filament that melts at a high temperature and cools quickly into a solid, stable structure, allowing you to draw in three dimensions. The possibilities are as boundless as your imagination, from simple flat designs to intricate three-dimensional sculptures.
Brief Overview of 3D Pen Capabilities
These pens aren’t just for professional artists or designers; they’re accessible to anyone—from kids wanting to add a dash of flair to their school projects to hobbyists looking to give their crafts a new twist. Whether you’re sketching a miniature Eiffel Tower or crafting a set of funky coasters, a 3D pen can bring a unique edge to your creations.
2. Getting Started with Your 3D Pen
Embarking on your 3D drawing adventure is undoubtedly thrilling, but setting up correctly can significantly enhance your experience. Whether you’re a novice or a hobbyist eager to explore the potential of 3D pens, here’s an in-depth guide to get you started smoothly and efficiently.
Choosing the Right 3D Pen
Selecting the appropriate 3D pen is crucial as it lays the foundation for your creative endeavors. Here are some factors to consider to ensure you choose the best pen for your “things to make with 3D pen” projects:
- Type of Control: Look for pens with adjustable speed and temperature controls. These features provide precision and flexibility for different types of projects.
- Type of Filament: Ensure the pen is compatible with either PLA or ABS filaments, as these are the most common and versatile.
- Ergonomics: Since you’ll be holding the pen for extended periods, choose a design that is comfortable in your hand.
- Additional Features: Some pens come with features like LCD screens for monitoring temperature, filament type indicators, and even battery-operated wireless models for better portability.
Understanding these specifications will help you make an informed decision, ensuring the pen meets your creative needs and comfort.
Basic Materials Needed
Before diving into creating stunning 3D art, you’ll need to gather a few essential materials:
- 3D Pen Filaments: Choose from:
- PLA (Polylactic Acid): Known for its eco-friendliness and available in a variety of colors and effects.
- ABS (Acrylonitrile Butadiene Styrene): Offers greater strength and flexibility, suitable for more durable creations.
- Silicone Mat: Serves dual purposes as your work canvas and protects your surfaces from heat and residue.
- Design Templates: Although optional, these are beneficial for beginners to practice and perfect their skills.
Setting Up Your Workspace
Creating an optimal workspace is key to a seamless and enjoyable 3D pen experience. Consider the following tips to set up your area:
- Ventilation: Since heated filaments can emit fumes, especially ABS, ensure your workspace is well-ventilated.
- Lighting: Good lighting is critical. Make sure your workspace is brightly lit to ease the strain on your eyes.
- Organization: Keep your filaments, tools, and accessories organized. Use storage solutions like drawers or containers to keep everything accessible.
- Surface: Use a flat, stable surface. A silicone mat not only protects your table but also provides a non-stick surface for your creations.
3. Basic Techniques to Master
Getting comfortable with your 3D pen is essential for transforming your visions into tangible art. Below are some foundational techniques you need to master. These steps are crucial for anyone interested in exploring the vast array of “things to make with a 3D pen”.
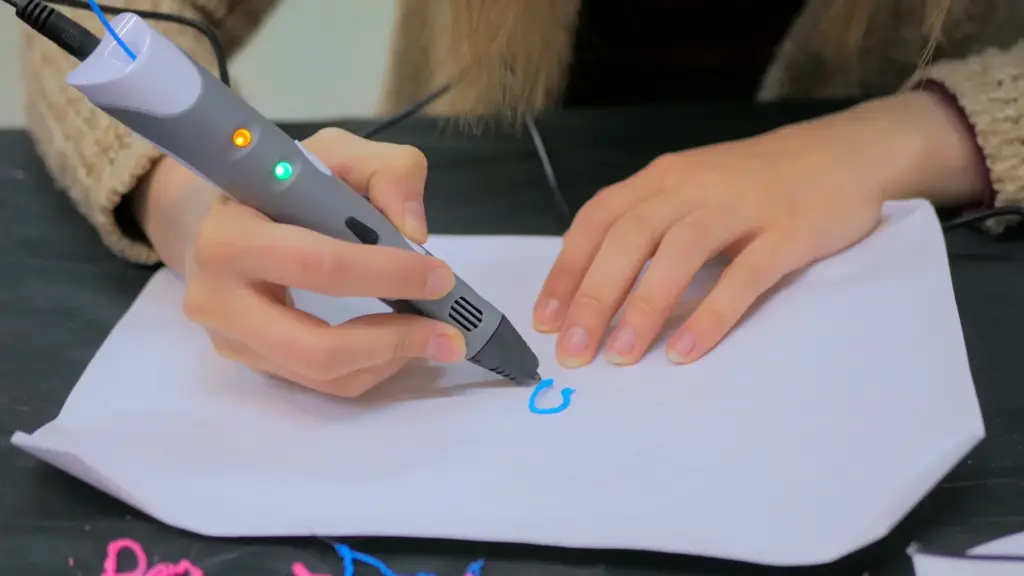
How to Hold and Operate a 3D Pen
The way you hold and operate your 3D pen can dramatically affect the quality and precision of your work. Here’s how to get started:
- Pen Grip: Hold your 3D pen like you would a normal pen or pencil. This grip offers the most control and comfort.
- Tip Awareness: Be conscious of the hot tip which extrudes the melted plastic. Maintaining the right distance from the work surface prevents smudging and allows the plastic to cool correctly, maintaining your desired shape.
- Pressure Control: Start with gentle pressure to get a feel for the flow of the plastic. As you gain confidence, adjust your pressure to create different effects and line thicknesses.
Understanding Different Speeds and Temperatures
The versatility of a 3D pen largely comes from its ability to adjust speed and temperature, which can affect the texture and strength of the material being used.
- Speed Settings:
- Low Speed: Ideal for intricate detailing and delicate parts of your project where precision is key.
- High Speed: Best used for filling larger areas or for laying down the first layers of a base structure quickly.
- Temperature Settings:
- High Temperature: Necessary for ABS plastic, which requires a higher melting point.
- Low Temperature: Suitable for PLA plastic, which is easier to mold and solidifies quickly at lower temperatures.
Adjusting these settings based on your material and the complexity of your project will help you achieve better results and increase the longevity of your 3D pen.
Practice Exercises to Get Started
Practicing with some structured exercises can significantly enhance your skill level. Here are a few to get you started:
- Lines and Shapes:
- Draw straight lines, then advance to various geometric shapes like triangles, squares, and circles.
- Focus on connecting these shapes to form 3D structures like cubes and pyramids.
- Layering:
- Begin with a simple outline, then layer additional plastic over it to add depth and volume.
- This technique is crucial for building more complex models and should be practiced with both flat and curved surfaces.
- Texturing:
- Use different drawing motions to create textures. For instance:
- Zigzags: Great for rough surfaces or simulating fur.
- Dots: Perfect for adding detail like eyes on a figure or texture on a landscape.
- Waves: Ideal for creating a sense of motion or fluidity, like water or clothing.
- Use different drawing motions to create textures. For instance:
4. Simple Projects for Beginners
Starting your 3D pen journey can be as thrilling as it is rewarding. Once you’ve mastered the basic techniques of operating your 3D pen, it’s time to put those skills to the test with some simple, fun projects. These beginner-friendly projects are perfect for getting accustomed to your device and they open up a world of possibilities for creative expression with “things to make with a 3D pen”.
3D Pen Bookmarks
Creating bookmarks is a fantastic way to begin crafting with your 3D pen. Here’s how you can make your bookmarks stand out:
- Start Simple: Begin with straightforward, elongated strips that serve as the base of the bookmark.
- Add Personal Touches: Customize the top of the bookmark with miniature 3D figures such as animals, flowers, or any design that sparks your interest.
- Flair and Functionality: Integrate abstract patterns or personal initials to the designs, making your bookmarks not only functional but also a reflection of your style.
Simple Jewelry: Rings and Bracelets
Jewelry making is an excellent way for beginners to practice precision and artistry with a 3D pen. Rings and bracelets can be both simple and stylish.
- Designing Rings: Start by measuring your finger size with a strip of paper and use it as a guide to create your ring. Experiment with different thicknesses and patterns.
- Crafting Bracelets: For bracelets, create a flexible, flat strip long enough to wrap around your wrist comfortably. Add clasps or loops at the ends to secure them.
- Personalization: Embellish with textures or embed small jewels into the plastic before it cools for that extra sparkle.
Miniature Figures
Miniature figures are not only fun to make but also great for practicing the manipulation of 3D shapes and details.
- Basic Shapes: Begin with simple geometric shapes like spheres for heads, cubes for bodies, and cylinders for limbs.
- Assemble: Connect these shapes to form various figures—human figures, animals, or fantastical creatures.
- Detailing: Add features like eyes, clothing, or texture to give character to your figures.
5. Home Decor Projects
Elevating your home decor with custom pieces created with a 3D pen can add a personal touch and uniqueness to your living space. These projects are perfect for those looking to take their “things to make with a 3D pen” skills to the next level by integrating functional art into their homes. Here are some inspiring ideas to get you started:
Decorative Vases
Creating decorative vases with a 3D pen allows you to match every detail to your existing home aesthetics. Here’s how to create a stunning vase:
- Start with the Base: Begin by crafting a sturdy base to ensure your vase can stand upright without tipping.
- Build Upward: Slowly build the walls of the vase, keeping them even and smooth. Experiment with shapes, whether traditional curves or modern angular designs.
- Customize: Incorporate colors and patterns that complement your room. You can add textures or layer different colors of filament to create depth.
- Finishing Touches: Consider smoothing out the final product with a light sanding, and perhaps seal it with a clear acrylic spray to enhance durability and water resistance.
Wall Art
Transform your walls with bespoke 3D art that reflects your personality and style.
- Choose a Theme: Decide on a theme or style, such as abstract geometric patterns, nature motifs, or even a skyline of your favorite city.
- Design Elements: Plan out your design on paper first. For complex pieces, consider creating individual elements that can be assembled later on the wall.
- Personalization: Personalize pieces further by integrating names, important dates, or inspirational quotes into your designs.
- Installation: Use double-sided tape or mounting putty to fix the lightweight pieces to the wall, ensuring they are secure without damaging your walls.
Coasters and Table Decor
Coasters are not only functional but also an excellent opportunity for experimenting with designs that can add a splash of creativity to your dining or coffee tables.
- Simple Designs: Start with simple circular or square shapes. Ensure they are slightly concave to catch drips effectively.
- Experiment with Textures: Use your 3D pen to create interesting textures that enhance grip and visual appeal, like spirals, geometric tessellations, or floral patterns.
- Material Choices: While most 3D pens use plastic, you can experiment with different filament types to match the aesthetic or practical needs of your home. Consider using wood-like or glow-in-the-dark filaments for added effect.
- Protective Coating: Apply a heat-resistant sealant to protect your coasters from heat and moisture, ensuring they last longer and continue to look great.
6. Fashion and Accessories with a 3D Pen
Using a 3D pen to create fashion accessories is an innovative way to bring a personalized touch to your wardrobe. This technology allows you to express your unique style and craftsmanship through wearable art. If you’re looking for “things to make with a 3D pen” that can spice up your fashion game, here are some trendy and creative ideas to get you started.
Eyeglass Frames
Creating custom eyeglass frames is not only stylish but also a great way to ensure you get the perfect fit. Here’s how you can make your own:
- Design Planning: Sketch out the design of your frames on paper first. Decide on the shape and size that best suits your face.
- Start with the Outline: Begin by tracing out the primary shape of the frames. Ensure that the parts that rest on your ears and nose are comfortable; consider padding these areas for extra comfort.
- Detailing: Add unique elements to your design, such as textures on the arms or decorative details on the corners.
- Fitting: Adjust the size and shape of the frames by reheating the plastic slightly and molding it to better fit your face. Ensure the lenses will fit securely within the frames.
- Durability and Comfort: Make sure the frames are sturdy yet flexible. You might want to reinforce the joints and bridge for additional strength.
Custom Shoe Designs
Personalizing your footwear can add a unique statement to your overall look. Here’s how you can use a 3D pen to customize your shoes:
- Direct Application: For a permanent design, use your 3D pen to draw directly on the shoe’s surface. Make sure to clean the surface thoroughly before starting.
- Detachable Accessories: Create clip-on or pin-on accessories that you can attach to your shoes. This allows you to change designs as often as you like.
- Design Ideas: Add floral patterns, geometric shapes, or even themed designs to match specific outfits or occasions.
- Materials and Finish: Use flexible filament to ensure the designs can withstand regular wear and tear without breaking.
Fashionable Keychains
Keychains are small, practical items that are excellent for testing your skill with intricate details. Here’s how to craft stylish and personalized keychains:
- Theme Selection: Choose a theme that resonates with your style—this could be anything from nature-inspired motifs to pop culture icons.
- Design and Craft: Sketch your design first, then use your 3D pen to bring it to life. Consider adding layers to give your keychain a 3D effect.
- Color and Texture: Play with different colors and textures. You can make a keychain look like metal by using metallic filaments or give it a glossy look with a special finish.
- Practicality: Ensure the keychain is not only stylish but also durable. Attach a robust key ring that can handle the wear and tear of daily use.
7. Educational Projects for Kids
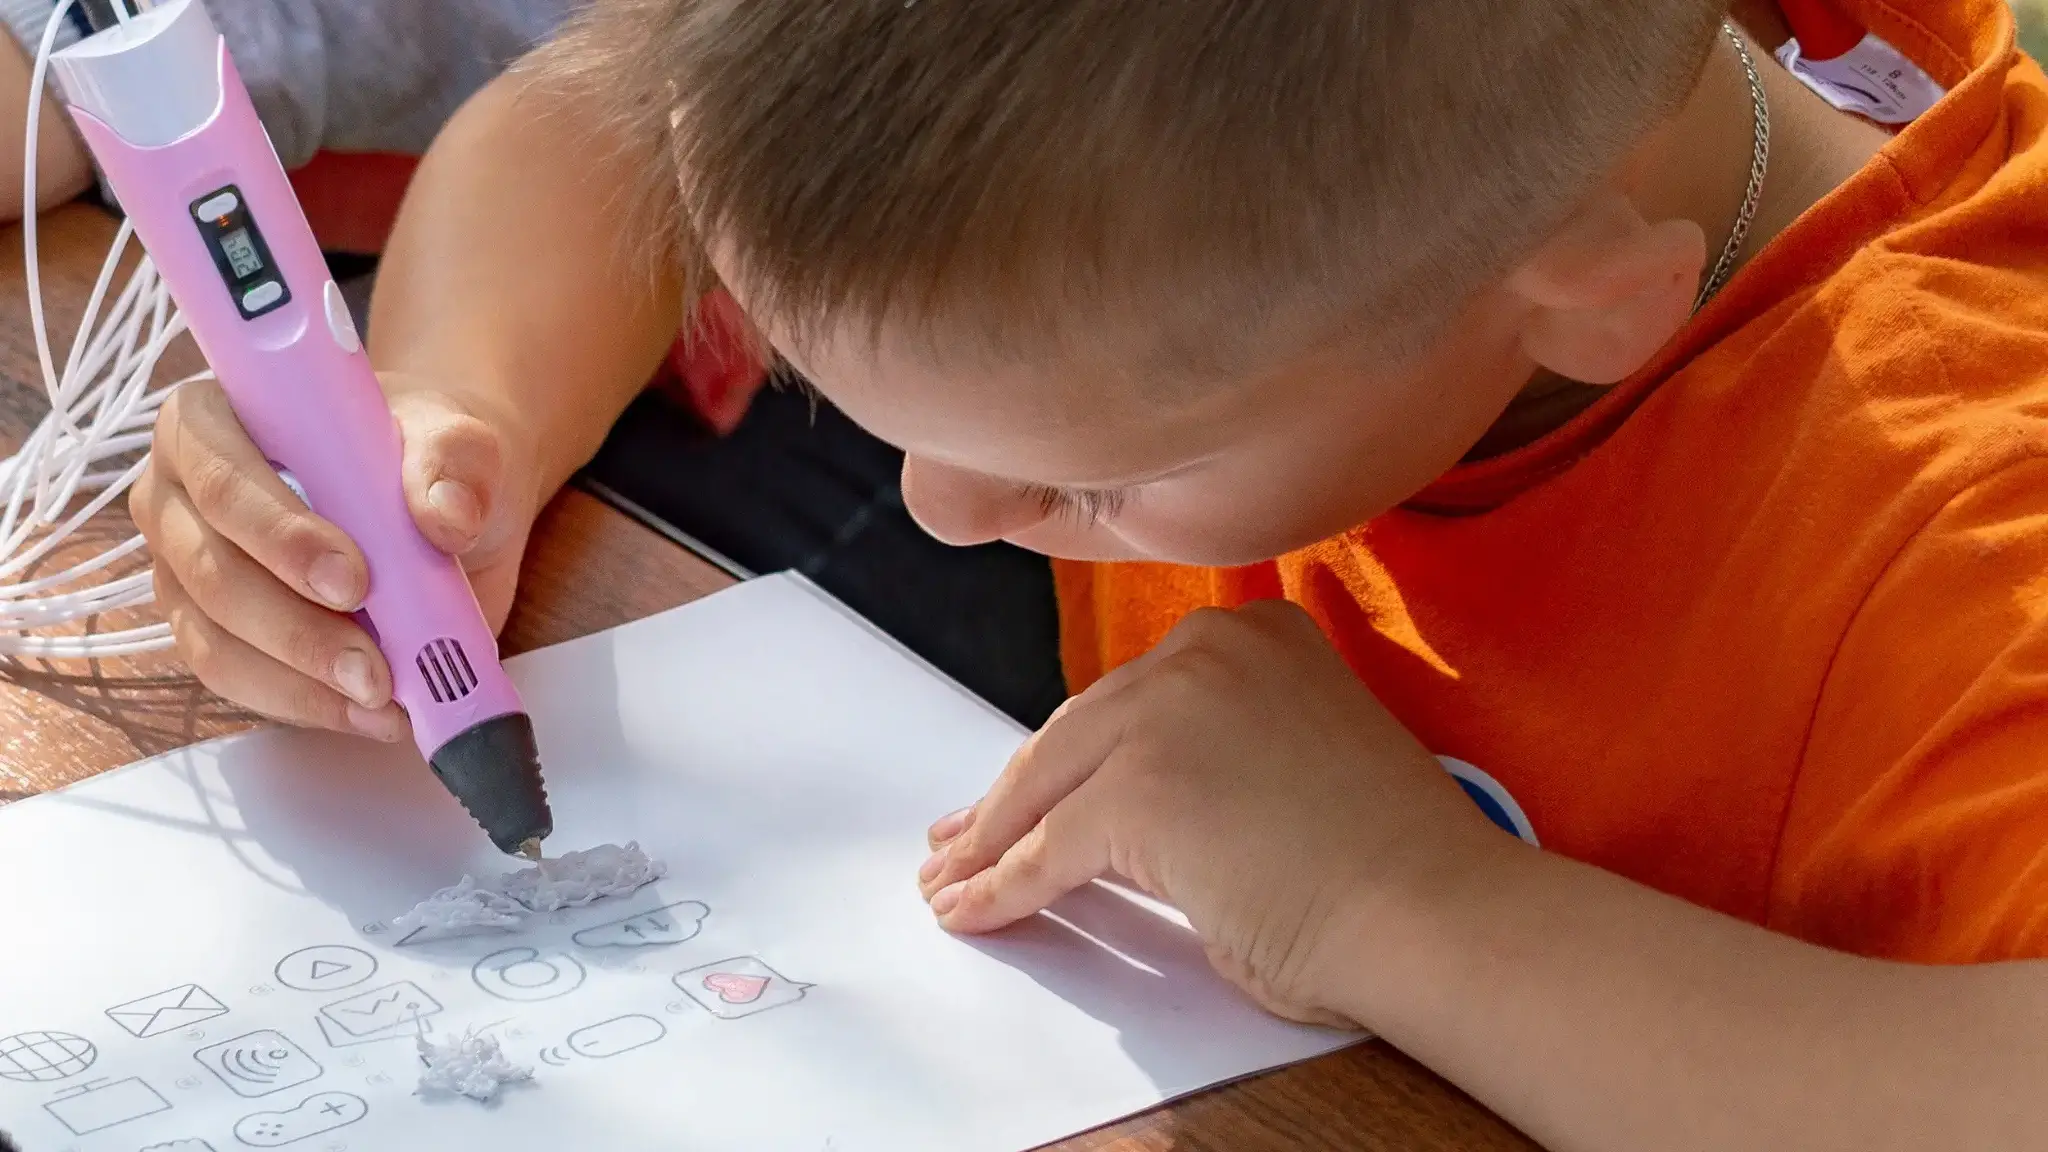
3D pens offer a unique medium to foster creativity and learning in children. By integrating “things to make with a 3D pen” into educational activities, kids can engage in hands-on learning that makes complex subjects more accessible and fun. Here are some educational project ideas that not only entertain but also educate.
Educational Models (Solar System, Geography Maps)
Building educational models with a 3D pen can enhance a child’s understanding of scientific and geographical concepts through tactile learning.
- Solar System Models:
- Project Setup: Start with the Sun and progress through each planet, discussing size, distance from the sun, and general characteristics.
- Design Tips: Use varied colors to differentiate between planets and include features like rings for Saturn and clouds for Jupiter.
- Learning Outcome: This project helps children visualize the vastness of space and the relative sizes of planets.
- Geography Maps:
- Project Setup: Create a topographic map or a map of a continent/country.
- Design Tips: Highlight different terrains using textures. Mountains can be rugged, while plains can be smooth.
- Learning Outcome: Builds spatial awareness and helps kids understand geographical diversity and topography.
Simple Toys and Puzzles
Creating toys and puzzles can be a delightful way for children to develop cognitive and motor skills.
- Interlocking Pieces:
- Project Idea: Design simple shapes that fit into each other, much like a jigsaw puzzle.
- Design Tips: Use bright colors and make pieces large enough for small hands to easily manipulate.
- Learning Outcome: Enhances fine motor skills and problem-solving abilities.
- Puzzle Animals:
- Project Idea: Create animal figures that are split into parts that need to be assembled.
- Design Tips: Include features like stripes or spots that need to align, adding an extra layer of challenge.
- Learning Outcome: Teaches animal anatomy in a fun way and improves recognition and matching skills.
Creative Learning Tools
Custom learning tools made with a 3D pen can make educational activities exciting and interactive.
- Alphabet Sets:
- Project Idea: Create a complete set of the alphabet, each letter designed uniquely.
- Design Tips: Integrate textures into the letters to enhance sensory learning or use theme-based designs (like animals for each letter).
- Learning Outcome: Aids in letter recognition and phonetic understanding, while stimulating sensory skills.
- Arithmetic Helpers:
- Project Idea: Develop tools like number lines or simple calculators.
- Design Tips: Make them colorful and interactive, possibly incorporating moving parts for calculations.
- Learning Outcome: Helps with basic arithmetic operations and introduces concepts of numbers and counting.
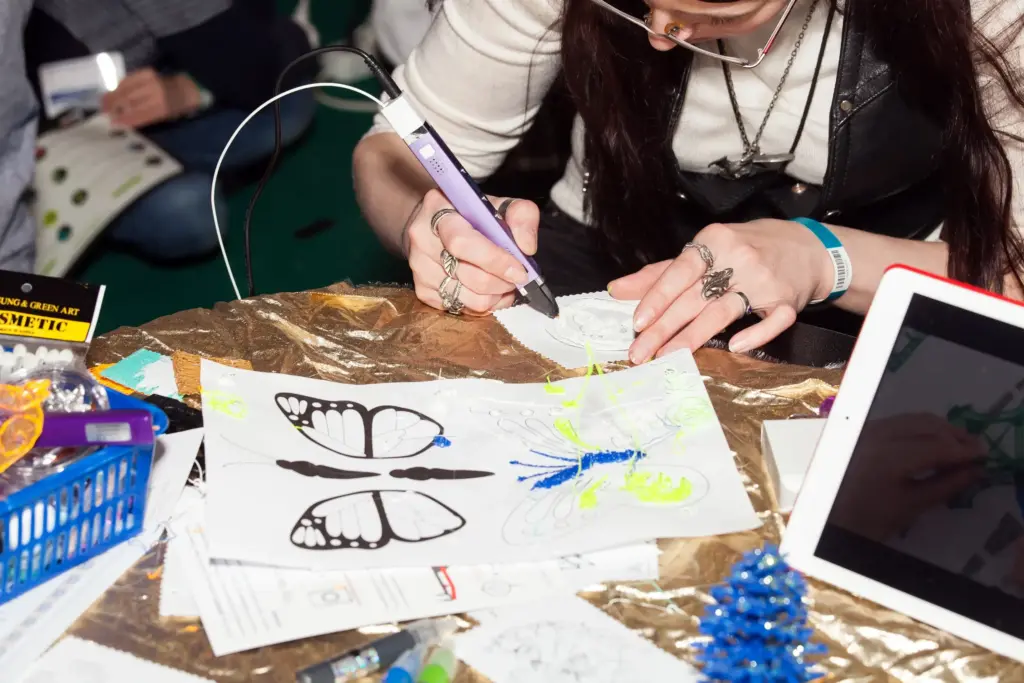
8. Advanced Artistic Creations
For those who have mastered the basics and are ready to elevate their 3D pen skills, advanced artistic creations offer a rewarding challenge. These sophisticated projects can transform ordinary spaces into showcases of personal expression and artistic prowess. Here’s how you can push the boundaries with “things to make with a 3D pen” to create art that captivates and inspires.
Sculptures and Complex Shapes
Creating sculptures with a 3D pen is about translating your vision into a three-dimensional reality, often requiring a blend of artistic vision and technical skill.
- Project Planning: Start with a detailed sketch or model of what you want to create. This blueprint will guide your work and help maintain proportions.
- Abstract Forms: Challenge yourself with abstract designs that require you to manipulate shapes and volumes in space. These forms can be free-standing or modular sculptures that piece together.
- Realistic Figures: Focus on creating lifelike figures, from human busts to animal statues. Pay attention to the nuances of anatomy and expression.
- Layering and Assembly: Build your sculptures by creating individual components and then assembling them. This method allows for more complex and dynamic structures.
Intricate Decorative Pieces
Decorative pieces crafted with a 3D pen can add a personal touch to any room or serve as unique gifts that are sure to be cherished.
- Design and Detail: Whether you’re crafting a delicate filigree pattern or a detailed architectural model, precision is key. Use a fine tip on your 3D pen for intricate work and slower extrusion settings.
- Centerpieces: Create eye-catching centerpieces for tables or shelves. Consider themes like floral arrangements, fantasy landscapes, or geometric patterns.
- Gifts: Personalize gifts with names, dates, or messages interwoven into the design, making them special and memorable.
Techniques for Detailing and Finishing
The finishing touches on your 3D pen creations can significantly enhance their appearance and durability.
- Sanding: Start with a coarse grit to remove larger imperfections and gradually move to finer grits for a smooth finish. Sanding is essential for pieces that require a high level of detail and smooth surfaces.
- Painting: Apply acrylic paints to add color or enhance details on your sculptures. Use a primer suited for plastics to ensure the paint adheres well and remains vibrant.
- Sealing: Protect your work and give it a polished look by applying a clear sealant. This not only enhances the aesthetic but also adds a protective layer against dust and damage.
9. Practical Everyday Uses
A 3D pen is not just for crafting and art; it can also be a highly practical tool around your home. With the ability to mend, create, and customize, the versatility of a 3D pen is vast, making it an indispensable gadget for everyday solutions. Explore these practical “things to make with a 3D pen” that can enhance functionality and add a personalized touch to your home environment.
Repairing Household Items
A 3D pen can serve as an innovative repair tool, especially for plastic items that are cracked or broken. Here’s how you can use your 3D pen for quick fixes:
- Filling Cracks: Use your 3D pen to deposit plastic into cracks on plastic items, such as containers, toys, or even furniture, effectively sealing the break.
- Reattaching Parts: If a part has snapped off, you can use your 3D pen to “weld” it back in place by extruding plastic along the break line, providing a strong bond.
- Reinforcing: For items that undergo regular stress, reinforce weak areas by adding extra layers of plastic, increasing durability and extending the item’s lifespan.
Custom Hooks and Holders
Organizing your space efficiently often requires custom solutions. A 3D pen allows you to create hooks and holders that are specifically designed to fit your space and needs.
- Designing Hooks: Whether you need a hook for your keys, cooking utensils, or garden tools, you can design and craft hooks that match the decor and functional requirements of any room.
- Creating Holders: Design holders for items like smartphones, glasses, or remote controls. Tailor the size and shape to perfectly accommodate the item it’s meant for.
- Installation: These custom pieces can easily be mounted with adhesive strips or incorporated into existing fixtures, providing a seamless look.
Personalized Gifts
Handmade gifts are always appreciated because they are thoughtful and unique. With a 3D pen, you can personalize and craft gifts that are tailor-made for your loved ones.
- Picture Frames: Create custom frames by designing around standard sizes or crafting a completely bespoke shape and size. Add personal touches such as names, dates, or meaningful symbols.
- Monogrammed Items: From pen holders to jewelry trays, adding a monogram can transform a simple object into a cherished keepsake.
- Decorative Bookmarks: Craft bookmarks that cater to the recipient’s tastes, such as shapes of favorite animals, symbols, or abstract designs.
10. Conclusion
Congratulations on embarking on this exciting journey with your 3D pen! From simple doodles to complex sculptures, the versatility of a 3D pen allows you to transform your creative ideas into tangible realities. Whether you’re decorating your home, enhancing your wardrobe, engaging kids with educational projects, or even fixing things around the house, the possibilities are endless. Remember, every artist was once a beginner, and every piece you create brings you one step closer to mastering this modern craft.
Embrace the learning curve, experiment with new ideas, and most importantly, have fun with it. The world of 3D pen art is vibrant and ever-expanding, and you are now equipped to be a part of it. So keep pushing the boundaries, and let your creativity soar!
11. FAQs
- What materials can I use with my 3D pen?
Most 3D pens use either PLA or ABS plastic filaments. PLA is biodegradable and comes in a variety of colors and effects, making it ideal for art projects. ABS is more durable and better suited for practical applications. Some advanced pens can also use PETG or flexible filaments. - How can I prevent my 3D pen from clogging?
To prevent clogging, always use high-quality filaments and ensure they are free from dust and debris. After finishing your project, extrude any remaining plastic to clear the pen’s extruder. Regular maintenance and following the manufacturer’s cleaning instructions will also help keep your pen in good shape. - What are some good starter projects for children?
Start with simple shapes like stars, hearts, or animals. 3D pen kits often come with stencils that can help children get accustomed to the pen’s movement and speed. Always supervise young children to ensure they use the 3D pen safely. - Can I use a 3D pen for professional purposes?
Absolutely! Architects, designers, and educators frequently use 3D pens for prototyping, model building, or even as a teaching tool. The precision and the ability to quickly bring concepts to life make 3D pens a valuable tool in professional settings. - How do I find inspiration for new projects?
Inspiration is everywhere! Try browsing online communities, social media platforms like Pinterest or Instagram, or 3D pen art exhibitions. Challenge yourself by incorporating elements from your hobbies, nature, or even everyday objects around you into your designs.
Resources


