
How to Make a 3D Printer Drone

1. Introduction
I’m excited to guide you through the process of creating your very own drone using a 3D printer. In this comprehensive guide, we’ll cover everything you need to know, from understanding what a 3D printer drone is to troubleshooting common issues. So let’s dive in and bring your drone dreams to life!
Drones have revolutionized various industries, from aerial photography to package delivery. With advancements in technology, the accessibility of 3D printers has opened up new possibilities for drone enthusiasts and makers. Creating a drone using a 3D printer allows for customization, flexibility, and cost-effectiveness.
2. Understanding 3D Printer Drones
What is a 3D Printer Drone?
A 3D printer drone, also known as a DIY drone, is a remotely operated unmanned aerial vehicle (UAV) that is constructed using a 3D printer. This approach enables enthusiasts to design and manufacture their own drones, tailoring them to their specific needs and preferences.
Benefits of 3D Printer Drones
One of the key advantages of building a drone using a 3D printer is the ability to customize its features, such as the frame design, size, and payload capacity. Additionally, 3D printer drones can be more affordable compared to pre-built options, and the process allows for continuous upgrades and modifications.
3. Getting Started: Materials and Equipment

Before diving into the drone-building process, it’s essential to gather the necessary materials and equipment. Here’s what you’ll need:
Choosing the Right 3D Printer
Selecting the right 3D printer is crucial for the success of your project. Consider factors such as print quality, build volume, filament compatibility, and budget. Research different models and read reviews to make an informed decision.
The ELEGOO Neptune 4 3D Printer, from the reputable ELEGOO brand, emerges as a powerful contender in the FDM printer market, especially for those on a budget.
- Speed: Offers a notable 500mm/s printing speed due to its Klipper motherboard. Ideal results at 250mm/s.
- Stability: Benefits from Dual Z-axis lead screws for consistent print quality and a spacious build volume of 8.85×8.85×10.43 inches.
- Extruder: Features a dual-gear direct drive extruder with a 5.2:1 ratio, reducing nozzle clogs.
- Material Compatibility: Supports multiple materials including high-temp filaments, thanks to its 300°C nozzle.
- Leveling: Incorporates a 121-point auto bed leveling system, complemented by manual leveling options.
Given its impressive specifications and the brand’s standing in the 3D printing world, the ELEGOO Neptune 4 seems like a solid choice for both beginners and more experienced users. The printer manages to offer advanced features often found in more expensive models, making it a potentially great pick for those wanting to get serious about 3D printing without breaking the bank.
Essential Materials for 3D Printing Drones
When it comes to building a drone using 3D printing technology, the choice of materials plays a pivotal role in the performance and durability of the final product. Apart from the 3D printer, which is the core equipment, the filament used for printing is critical. Below, we’ll explore the most commonly used filaments in drone manufacturing and why they’re preferred.
Types of Filaments
- ABS (Acrylonitrile Butadiene Styrene):
- Properties: ABS is a thermoplastic polymer known for its strength, flexibility, and heat resistance. It’s one of the most popular materials in the 3D printing industry.
- Why It’s Used for Drones:
- Durability: ABS can withstand impacts and is less likely to break upon collision, a common occurrence with drones.
- Heat Resistance: This is crucial for parts exposed to high temperatures, like near motors or electronic components.
- Flexibility: ABS can flex under pressure, making it suitable for parts that require a bit of give, such as propellers.
- PLA (Polylactic Acid):
- Properties: PLA is a biodegradable thermoplastic derived from renewable resources like cornstarch. It’s known for being environmentally friendly.
- Why It’s Used for Drones:
- Ease of Use: PLA is easier to print with compared to ABS as it doesn’t require a heated bed and has minimal warping issues.
- Finish and Aesthetics: PLA offers a shinier and smoother finish, which is appealing for the external parts of a drone.
- Lightweight: Being lighter than ABS, PLA can be advantageous for increasing the flight efficiency of the drone.
Choosing the Right Material
The choice between ABS and PLA depends on the specific requirements of the drone. For instance, if you prioritize durability and heat resistance, ABS is the better choice. On the other hand, if you prefer ease of use, environmental friendliness, and a lighter frame, PLA would be more suitable.
Both ABS and PLA have their unique advantages when it comes to 3D printing drone parts. Understanding these properties helps in selecting the right material based on the drone’s intended use and performance requirements.
Additional Tools and Accessories for 3D Printing Drones
Creating a 3D printed drone requires more than just a printer and filament. A variety of additional tools and accessories are essential for the assembly, wiring, and finishing stages. This section will outline the key tools and accessories needed and explain their specific roles in the drone-building process.
Essential Tools and Their Uses
- Filament Cutter:
- Purpose: Used for cleanly cutting the filament.
- Importance in Drone Building: Ensures precise filament length, aiding in better print quality and consistency.
- Tweezers:
- Purpose: For handling small or delicate parts and removing excess material.
- Importance in Drone Building: Ideal for post-printing cleanup and placing tiny components accurately.
- Screwdrivers (Various Sizes):
- Purpose: For assembling parts with screws.
- Importance in Drone Building: Essential for securely fastening different parts of the drone, like attaching motors to the frame.
- Wire Cutters:
- Purpose: To cut and trim wires.
- Importance in Drone Building: Crucial for electrical wiring, ensuring neat and safe connections.
- Heat Shrink Tubing:
- Purpose: To insulate wires and connections.
- Importance in Drone Building: Provides a professional finish to wiring, prevents short circuits, and enhances durability.
Additional Accessories
- Calipers:
- Use: For precise measurements of parts.
- Relevance: Ensures that components fit perfectly, critical in a precision device like a drone.
- Soldering Iron:
- Use: For joining electrical components.
- Relevance: Necessary for attaching components like motors and electronic speed controllers (ESCs) to the drone’s mainboard.
- Pliers:
- Use: For gripping and bending materials.
- Relevance: Useful in manipulating wires and small mechanical parts.
- Cleaning Materials:
- Use: For maintaining the printer and cleaning parts.
- Relevance: Ensures longevity of the printer and quality of the prints.
In addition to the 3D printer and filament, a comprehensive set of tools and accessories is crucial for the successful creation of a 3D printed drone. These tools not only facilitate the assembly process but also ensure precision, safety, and durability of the final product. Assembling a well-equipped toolkit is an essential step for anyone venturing into the field of 3D printed drones.
4. Designing the Drone

To begin designing your drone, you’ll need access to design software. Here are the key steps involved:
Selecting a Design Software
Choose a design software that suits your level of expertise. Options like AutoCAD, Tinkercad, or Fusion 360 are popular choices among drone makers due to their user-friendly interfaces and powerful capabilities.
Choosing the Drone Components
Research and select the necessary components for your drone, such as motors, propellers, flight controller boards, and batteries. Ensure compatibility between the components to avoid any issues during assembly.
Building a drone involves selecting various components that work in harmony. The right choice of motors, propellers, flight controller boards, and batteries is crucial for the drone’s performance and reliability. This section will guide you through the process of choosing these components, emphasizing the importance of compatibility.
Key Components of a Drone
- Motors:
- Purpose: Provide the necessary thrust to lift and maneuver the drone.
- Considerations:
- Type and Size: Depends on the drone’s size and intended use (e.g., racing, photography).
- Power Rating: Must align with the drone’s weight and the battery’s capacity.
- Propellers:
- Purpose: Convert the motor’s rotational power into thrust.
- Considerations:
- Size and Pitch: Should match the motor’s specifications for optimal efficiency.
- Material: Typically made of plastic or carbon fiber; the latter offers more durability but at a higher cost.
- Flight Controller Boards:
- Purpose: Acts as the drone’s brain, controlling stability and navigation.
- Considerations:
- Features: Look for gyroscopes, accelerometers, and GPS capabilities based on your needs.
- Firmware Compatibility: Ensure it’s compatible with your software preferences.
- Batteries:
- Purpose: Power the motors and electronic components.
- Considerations:
- Capacity (mAh): Higher capacity means longer flight times but also increases weight.
- Voltage (V): Must be compatible with the motors and flight controller.
- Type: Lithium Polymer (LiPo) batteries are common due to their high energy density.
- Cameras
- Purpose: Capture video or images, critical for tasks like aerial photography, surveillance, or FPV (First Person View) racing.
- Considerations:
- Quality and Resolution: Depending on your requirements, choose from HD, 4K, or higher resolutions.
- Weight and Size: Ensure the camera is light enough not to hinder the drone’s performance.
- Compatibility: The camera should be compatible with the drone’s mounting system and able to connect to the flight controller or transmitter, if necessary.
- Gimbal Support: For stable footage, consider if the drone can support a gimbal system.
- Field of View: Wider for immersive experiences or narrower for focused shots.
Ensuring Compatibility
- Cross-Checking Specifications:
- Carefully read the specifications of each component to ensure they align. For instance, the battery’s voltage should match the motors’ requirements.
- Seeking Expert Advice:
- If unsure, consult with experienced drone builders or online forums.
- Testing Before Final Assembly:
- Test components together in a controlled environment to identify any compatibility issues.
Selecting the right components for your drone is a meticulous process that requires careful consideration of each part’s specifications and compatibility. By understanding the role and requirements of each component, you can assemble a drone that meets your specific needs and performs reliably in its intended application.
Customizing the Design
With the selected components in mind, it’s time to design the drone’s frame and other parts. Use the design software to create or modify existing designs. Pay attention to factors like weight distribution, aerodynamics, and structural integrity.
5. Preparing the 3D Printer

Before printing the drone parts, proper calibration and setup of your 3D printer are essential. Follow these steps:
Calibrating the Printer
Calibration ensures that the printer’s extruder and print bed are aligned correctly. Refer to the printer’s manual or online resources for instructions on calibrating your specific printer model.
Setting Up the Print Bed
Clean the print bed thoroughly and apply adhesive (such as glue stick or painter’s tape) to ensure proper adhesion of the printed parts. Adjust the bed leveling and set the appropriate temperature for the filament you’re using.
Adjusting Print Settings
Optimize the print settings in your slicer software. Adjust parameters such as layer height, print speed, infill density, and support structures. These settings will affect the strength, quality, and appearance of the printed parts.
6. Printing the Drone Parts

With the printer properly set up, it’s time to start printing the drone parts. Follow these guidelines for successful prints:
Choosing the Printing Filament
Consider the specific requirements of your drone’s parts when selecting filament. ABS filament offers durability, while PLA filament provides ease of use. Experiment with different filaments and settings to find the optimal combination.
Optimizing Print Settings for Each Part
3D printing drone parts requires precise settings adjustments to achieve the best results. Different components of the drone have varying structural and functional requirements, necessitating specific print settings for optimal performance.
Key Print Settings for Drone Parts
- Frame:
- High Infill Density: The frame needs to be strong to support the entire structure of the drone.
- Layer Height: A medium layer height can provide a balance between print strength and time.
- Propellers:
- Fine Resolution: This ensures smoother airflow and better efficiency.
- Lower Infill Density: While strength is important, too much density can make the propellers heavy and less efficient.
- Other Components (e.g., Landing Gear, Camera Mounts):
- Variable Settings: Depending on the part’s role, adjust settings like infill density, print speed, and layer height for the right balance of strength, weight, and print quality.
Tailoring Settings for Material
- ABS vs. PLA: Remember that different materials may require different print temperatures and bed adhesion methods.
Ensuring Proper Cooling and Support Structures
Importance of Cooling
- Preventing Warping: Proper cooling is essential to prevent parts from warping, which is especially crucial for larger parts like the drone frame.
- Enhancing Layer Adhesion: Good cooling can improve layer adhesion, resulting in stronger prints.
Cooling Strategies
- Use of Fans: Most 3D printers come with cooling fans. Ensure they are directed correctly at the print.
- Printer Settings: Enable cooling features in your printer’s software, adjusting fan speed as necessary for different parts.
Support Structures for Complex Geometries
- Overhangs and Complex Shapes: Parts with overhangs or complex shapes may require support structures to prevent drooping during printing.
- Design Considerations: While designing or choosing designs, be mindful of these aspects to reduce the need for extensive support, which can save material and time.
Optimizing print settings for each component and ensuring proper cooling and support structures are vital steps in 3D printing drone parts. These practices not only enhance the quality and durability of the prints but also contribute to the overall performance and longevity of the drone.
7. Assembling the Drone
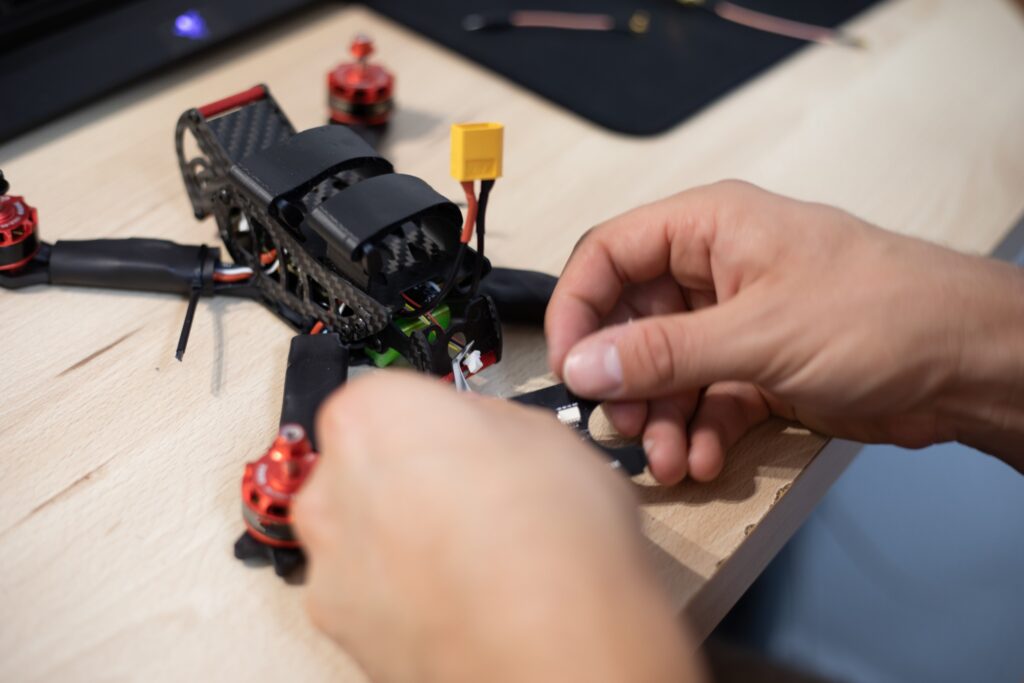
Once you’ve printed all the necessary parts for your drone, the next crucial step is assembly. This process requires attention to detail and a systematic approach to ensure that all components are correctly and securely fitted. Here’s a step-by-step guide to help you through this phase.
Identifying and Sorting the Printed Parts
- Organization: Before you begin assembling, lay out all the printed parts. Group them based on their function and where they fit in the drone.
- Assembly Order: Arrange the parts in the order they will be assembled. This practice prevents any confusion during the assembly process and ensures a smooth workflow.
Attaching Motors and Electronic Components
- Mounting Motors:
- Securely attach each motor to the drone frame. Use the screws and tools that come with the motors or as recommended in the drone design.
- Note: Ensure the motors are aligned correctly, as their orientation impacts the drone’s flight.
- Connecting Electronic Speed Controllers (ESCs):
- Each motor should be connected to an ESC. The ESC regulates the power supplied to the motor.
- Attention to Detail: Double-check connections for correct polarity and secure attachment.
Connecting the Wiring
- Wiring Diagram: Refer to the wiring diagram provided with your flight controller board. This diagram is crucial for understanding how to connect all the electronic components.
- Step-by-Step Process:
- ESCs to Flight Controller: Connect the ESCs to the flight controller. This is essential for motor control.
- Flight Controller to Receiver: Connect the flight controller to the receiver. This link allows the drone to receive signals from the remote control.
- Additional Components: If your drone includes other components like cameras or sensors, connect them according to the flight controller’s guidelines.
- Polarity and Security:
- Always be mindful of the correct polarity – connecting wires backwards can damage components.
- Use zip ties or electrical tape to neatly bundle and secure the wiring, preventing disconnections during flight.
Assembling a 3D printed drone is a detailed and rewarding process. By organizing your parts, carefully attaching motors and electronic components, and diligently connecting the wiring, you can build a functional and efficient drone. Remember to take your time and double-check each step for the best results.
8. Testing and Troubleshooting

After assembling your 3D printed drone, it’s imperative to perform thorough testing and troubleshooting before attempting its first flight. This process ensures that the drone is safe to operate and performs as expected.
Conducting a Thorough Check
- Visual Inspection:
- Connections: Verify that all electronic connections are secure and correctly polarized.
- Mechanical Integrity: Ensure all screws and fittings are tightened and that there are no loose parts.
- Motor and Control Surface Testing:
- Motor Spin: Check that each motor spins freely without obstruction and that the propellers are correctly installed.
- Control Surfaces: Test the movement of any control surfaces (if applicable) to ensure they respond correctly to the commands.
- Balance and Calibration:
- Center of Gravity: Check the drone’s balance. Adjust the position of the battery or other components if necessary to achieve proper balance.
- Sensor Calibration: Calibrate the flight controller’s sensors following the manufacturer’s guidelines.
Troubleshooting Common Issues
If you encounter any issues during testing, refer to troubleshooting guides or online communities for help.
- Motor Calibration:
- If the motors are not responding correctly, recalibrate them using your flight controller’s software.
- Flight Controller Configuration:
- Incorrect configurations can lead to unstable flight. Refer to the manual or online guides for proper setup.
- Radio Interference:
- Test the drone in different locations to rule out local radio interference. Ensure your control frequencies are not being disrupted by nearby devices.
- Online Resources:
- Utilize online forums and communities. Experienced drone enthusiasts often provide valuable insights and solutions.
Making Adjustments and Repairs
If any parts or connections need adjustment or repair, address them before attempting to fly the drone. Replace damaged parts and reconfigure settings as needed.
- Addressing Issues:
- If you identify any problems, make the necessary adjustments or repairs before attempting to fly.
- Parts Replacement: Replace any damaged or malfunctioning parts. Ensure replacements are compatible with your drone’s design.
- Reconfiguration:
- Update or reconfigure your flight controller settings as needed based on your test findings.
- Final Checks:
- Conduct a final check to ensure all adjustments and repairs have been successfully implemented.
Thorough testing and troubleshooting are critical steps in the drone-building process. By methodically inspecting, testing, and addressing any issues, you ensure the safety and functionality of your 3D printed drone. Patience and attention to detail during this phase can significantly enhance your drone’s performance and longevity.
9. Finishing Touches for Your 3D Printed Drone
Once you have assembled and tested your drone, adding the finishing touches can enhance both its aesthetics and functionality. This phase involves painting and decoration, ensuring secure assembly, balancing for optimal performance, and adding safety features.
Painting and Aesthetics
Personalize your drone by applying paint or decals.
- Personalization:
- Painting: Choose paints that are suitable for the material of your drone (ABS, PLA, etc.). Ensure the paint is lightweight to avoid adding unnecessary weight.
- Decals: Apply decals for a custom look. These are generally light and won’t affect the drone’s performance.
- Considerations:
- Weight: The added materials should be minimal in weight to not impact flight performance.
- Conductivity: Avoid materials that could interfere with the drone’s electronics, like metallic paints or conductive adhesives.
Securing and Balancing the Drone
- Tightening Components:
- Ensure all screws and fasteners are securely tightened. Loose components can lead to instability or damage during flight.
- Balancing:
- Check the drone’s center of gravity. The drone should be well-balanced around its center to ensure stable flight.
- Make adjustments by slightly shifting the position of the battery or other components if necessary.
Adding Safety Features
Incorporate safety features such as propeller guards and landing gear to prevent damage to the drone and surrounding objects during flight.
- Propeller Guards:
- Install propeller guards to protect the propellers from damage and to prevent injuries.
- These guards can also protect against damage during minor collisions.
- Landing Gear:
- Fit landing gear to protect the drone’s undercarriage during takeoff and landing.
- Ensure the landing gear is sturdy and does not wobble, which could affect landing stability.
- Visibility Enhancements:
- Consider adding LED lights or reflective materials to improve visibility during flight, especially in low-light conditions.
The finishing touches on your 3D printed drone not only improve its visual appeal but also contribute to its overall safety and performance. By personalizing your drone, ensuring all parts are secure and balanced, and adding protective features, your drone will be well-prepared for safe and efficient flying experiences.
10. Flying Your 3D Printer Drone

Congratulations! It’s time to take your 3D printer drone for its maiden flight. Follow these steps for a successful experience:
Familiarizing Yourself with Flight Controls
Read the user manual of your flight controller and transmitter to understand the various flight controls. Practice with a simulator if available to gain confidence before flying.
Performing a Test Flight
Choose an open area away from people and obstacles for your test flight. Gradually increase the altitude and observe the drone’s stability and responsiveness. Make necessary adjustments if required.
Safety Precautions and Regulations
Adhere to local regulations and best practices for drone flying. Follow safety guidelines such as maintaining line of sight, avoiding restricted airspace, and respecting privacy. Be aware of weather conditions that may affect flight stability.
11. Conclusion
Building a drone using a 3D printer is an exciting and rewarding endeavor. By following the step-by-step process outlined in this guide, you’ve gained the knowledge and skills to create your own customized drone. Remember to always prioritize safety and keep up with the latest advancements in drone technology.
12. FAQs
- How long does it take to 3D print a drone?
The time required to 3D print a drone can vary depending on factors such as the complexity of the design, the size of the drone, and the speed of your 3D printer. On average, it can take several hours to print all the necessary parts. Larger drones with intricate designs may take longer, while smaller and simpler drones can be printed relatively quickly. It’s important to note that printing times can also vary based on the settings and parameters you choose in your slicer software. - Can I modify my drone after it’s assembled?
Absolutely! One of the advantages of building a drone using a 3D printer is the ability to modify and upgrade it easily. If you want to make changes or improvements to your drone after assembly, simply design and print the new parts you need. Whether you want to enhance its performance, add new features, or change its aesthetics, your 3D printer gives you the flexibility to adapt and customize your drone according to your evolving needs and preferences. - Are there any legal restrictions for flying 3D printer drones?
Yes, there are legal restrictions and regulations that you need to be aware of when flying a 3D printer drone. The specific rules can vary depending on your country or region, so it’s important to research and understand the local regulations before taking your drone to the skies. Common restrictions include flying within line of sight, avoiding crowded areas, maintaining a safe distance from airports and sensitive locations, and respecting privacy. Some regions also require registration of drones above a certain weight. Stay informed and fly responsibly to ensure compliance with the applicable laws. - What should I do if my drone crashes during a flight?
In the unfortunate event of a drone crash, it’s essential to assess the damage and take appropriate steps for repair. Start by carefully examining the drone and identifying any broken or damaged parts. Replace any components that are beyond repair. Inspect the wiring and connections to ensure everything is intact. Additionally, check the flight controller and sensor boards for any signs of damage. Once you’ve identified the issues, refer to online resources, user manuals, or seek assistance from drone communities to troubleshoot and fix the specific problems you’re facing. It’s always a good idea to have spare parts on hand for such situations. - Can I use any type of filament for 3D printing a drone?
While there are various types of filaments available for 3D printing, not all of them are suitable for printing drone parts. The two most commonly used filaments for drone construction are ABS (Acrylonitrile Butadiene Styrene) and PLA (Polylactic Acid). ABS is known for its durability, strength, and resistance to high temperatures, making it suitable for components that undergo stress or require flexibility. PLA, on the other hand, is easier to print with and offers good structural integrity. It’s important to choose filaments that have the appropriate mechanical properties for the specific drone parts you’re printing. Experimenting with different filaments and settings can help you find the optimal combination that meets your requirements.
Resources
- https://www.autodesk.com/
- https://www.autodesk.com/products/fusion-360/personal
- https://www.tinkercad.com/
- https://dronedecoded.com/drone-parts-a-comprehensive-guide/
- https://dronedecoded.com/quadair-drone-experience-guide/
- https://dronedecoded.com/drone-for-a-gopro-finding-the-perfect-match/


