
How to Fix Shifting 3D Print on Anycubic Cobra

Hey there, fellow 3D printing enthusiast! If you’re searching for ‘How to Fix Shifting 3D Print on Anycubic Cobra’, you’ve landed in the right place. I’ve faced the same issue and understand your frustration. Ready to tackle this challenge? Let’s dive in!
I. Introduction
Printing in 3D is thrilling, isn’t it? Watching your ideas literally take shape before your eyes is magical. But sometimes, things don’t go as planned, like when you see that unexpected shift in your print. Don’t worry, though! We’ll tackle this together.
II. Understanding the Problem of Shifting in 3D Printing
3D print shifting, often referred to as “layer shifting,” can significantly impact the quality and accuracy of a 3D print. It’s essential for enthusiasts and professionals using Anycubic Cobra 3D printers to grasp this issue comprehensively. This in-depth exploration aims to elucidate the nature of 3D print shifting, its types, and the root causes. By doing so, users can apply effective solutions to mitigate this problem.
What is 3D Print Shifting?
3D print shifting is characterized by the misalignment of layers during the 3D printing process. Ideally, in 3D printing, each successive layer should align precisely atop its predecessor. However, when shifting occurs, these layers are misaligned, leading to a print that is skewed or offset from its intended design. This misalignment can severely impact the aesthetic and structural integrity of the printed object.
Types of Shifts:
- Horizontal Shifts:
- Definition: Horizontal shifts are displacements that occur in the X or Y-axis of the printer. They are the most frequently encountered type of shift in 3D printing.
- Manifestation: This type of shift results in the print appearing staggered or stepped on one side, deviating from the intended design.
- Impact: Horizontal shifts can compromise the dimensional accuracy of the print and may cause issues in parts intended to fit together.
- Vertical Shifts:
- Definition: These are less common but occur due to issues in the Z-axis.
- Manifestation: In vertical shifts, layers stack either higher or lower than they should, leading to a print that has uneven layer heights.
- Impact: Such shifts can weaken the structural integrity of the print and affect its functional capabilities.
Root Causes:
Understanding the underlying causes of layer shifting is crucial for effective troubleshooting:
- Hardware Issues:
- Loose Belts: Belts that are not adequately tensioned can slip during printing, causing shifts.
- Worn-out Pulleys: Over time, pulleys can wear down, leading to inconsistent movement and layer shifts.
- Stepper Motor Problems: Issues with stepper motors, such as overheating or inadequate torque, can lead to shifts in printing layers.
- Software Glitches:
- Outdated Firmware: Running outdated firmware on your Anycubic Cobra can lead to compatibility issues and inconsistent printing behavior.
- Incorrect Slicer Settings: Incorrect settings in your slicing software can result in printing errors, including layer shifts.
- External Factors:
- Environmental Disturbances: External influences such as gusts of wind, accidental nudges, or even vibrations from nearby machinery can disrupt the printing process.
- Power Interruptions: Brief power interruptions or fluctuations can cause the printer to lose its position, leading to layer misalignment.
III. Essential Tools and Supplies for Fixing Shifting 3D Prints on Anycubic Cobra
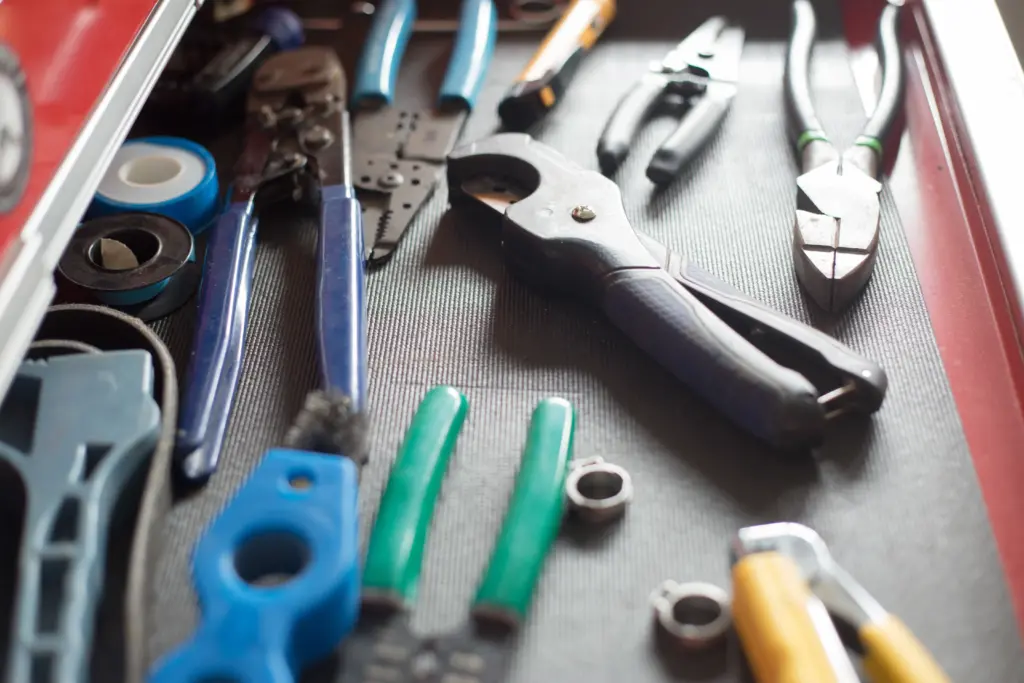
To fix shifting 3D print on Anycubic Cobra, equipping yourself with the right tools and supplies is critical, especially when dealing with a high-precision device like this one. A comprehensive toolbox is essential in simplifying the diagnosis and resolution of problems causing layer shifting. In the following sections, we’ll explore the key tools and supplies every Anycubic Cobra user needs to have. This guide is tailored to help both novices and seasoned 3D printing enthusiasts in improving their experience with the printer.
1. Allen Wrenches
- Purpose: Allen wrenches are indispensable for tightening and adjusting screws on your 3D printer. These simple tools play a critical role in maintaining the structural integrity of your printer.
- Usage: Regularly check and tighten screws, especially those on the moving parts of the printer, to prevent any wobble or misalignment that can cause layer shifting.
2. Lubricant
- Selection: Choose lubricants specifically formulated for 3D printers. These are designed to withstand the unique conditions of 3D printing, such as high temperatures and constant motion.
- Application: Apply lubricant to the printer’s rods and bearings to ensure smooth and consistent movement. This helps in reducing friction, which is a common cause of layer shifting.
3. Clean Cloth
- Type: A microfiber cloth is highly recommended for its ability to clean without leaving fibers or residues behind.
- Usefulness: Use it for wiping down the print bed to ensure it’s free of dust and debris. A clean print bed is essential for good bed adhesion and print accuracy.
4. Caliper
- Function: A caliper is a precise measuring tool crucial for ensuring that every component of your printer is correctly aligned and calibrated.
- Application: Use it to measure the distance between printer parts and to verify that the print bed and other components are properly aligned.
5. Spatula or Scraper
- Purpose: These tools are essential for safely and effectively removing prints from the print bed.
- Technique: Employ a gentle yet firm technique to lift prints without damaging either the print or the bed surface.
6. Digital Level
- Importance: Ensuring that your print bed is perfectly level is key to preventing layer shifts.
- Usage: A digital level provides a more accurate reading than traditional bubble levels, enabling precise bed leveling.
IV. Step-by-Step Guide to Fix Shifting
Calibration of the Printer
Calibration is all about precision. It ensures your printer understands its boundaries and movements.
Why Calibration Matters:
To fix shifting 3D print on Anycubic Cobra, it’s important to understand that your printer functions on precise coordinates. Even minor discrepancies in these coordinates can lead to print issues such as shifting, necessitating careful adjustments and calibration for optimal performance.
Steps to Calibrate your Anycubic Cobra:
- Home Your Printer: Start by sending your printer to its home position. This establishes a reference point for all future movements.
- Level the Bed: Use the digital level or onboard tools, if available, to ensure the bed is level on all sides. The Anycubic Cobra often has an auto-leveling feature, but it’s good to double-check manually.
- Calibrate the Extruder: Make sure it’s feeding the filament correctly. Mark the filament, then instruct the printer to feed a specific length (like 100mm). Measure to ensure it matches your command.
- Check the X, Y, and Z Axes: Ensure all axes move smoothly and without obstruction. Clean and lubricate if necessary.
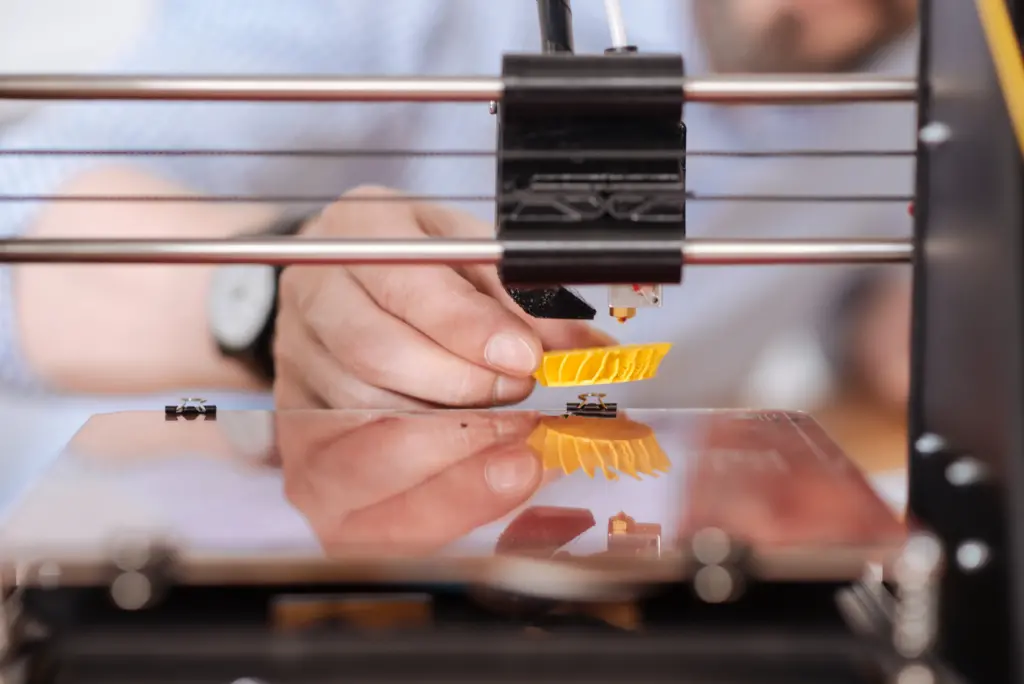
- Print a Calibration Cube: This small 3D object will help you check if all dimensions are accurate and if there are any issues with layer alignment.
- Adjust Slicer Settings: Based on the results from the calibration cube, make any necessary tweaks in your slicer software.
Regular calibration, especially after transporting or making changes to your printer, is a key step to ensure consistently high-quality prints.
Checking for Mechanical Issues
Every intricate machine, like our Anycubic Cobra 3D printer, relies on the seamless operation of its mechanical components. Regular inspections can prevent bigger issues.
- Belts: A primary culprit of layer shifting. Inspect for any signs of wear or slack. They should be taut but not overly tight. A plucked belt should resonate like a low-pitched guitar string.
- Pulleys and Gears: Ensure they are free from debris. Over time, dirt or bits of filament can accumulate, causing irregular movements. Tighten any loose pulley screws.
- Stepper Motors: These drive your printer’s movement. A malfunctioning motor might skip steps or overheat. If a motor feels too hot to touch, it may be failing or overworking.
- Bearings and Rods: They should glide smoothly. If you notice any grinding or resistance, clean and lubricate them. Make sure rods are straight and free from dents.
- Endstops/Sensors: Ensure they’re functioning correctly. If the printer doesn’t accurately detect its limits, it can easily result in layer shifts.
Examining the Print Bed
The foundation of any great 3D print is a well-prepared bed. Let’s ensure it’s in top shape.
- Cleanliness: Any debris or oils (even from your fingers) can affect print adherence. Clean the bed using isopropyl alcohol and a lint-free cloth.
- Leveling: While we touched on this in calibration, it’s vital to emphasize. A perfectly leveled bed ensures the initial layers stick well, preventing warping or detachment.
- Adhesion: For trickier prints, consider using adhesion helpers. This could be painter’s tape, glue sticks, or specialized sprays. They ensure the print sticks but can also be removed easily post-printing.
- Surface Inspection: Over time, print beds can get scratched or damaged. Ensure there are no noticeable divots or bumps which might affect the print quality.
- Bed Temperature: Ensure the heated bed (if your model has one) reaches and maintains the right temperature. An unevenly heated bed can lead to print warping.
Software and Slicer Settings
The software realm is where your 3D model transforms into a tangible object. A few tweaks here can make all the difference.
- Firmware Updates: Manufacturers periodically release updates to improve performance. Always ensure you have the latest firmware for your Anycubic Cobra.
- Slicer Software: Different slicers have varied settings and features. Whether you’re using Cura, PrusaSlicer, or any other, ensure it’s compatible with your printer and updated.
- Layer Height: Adjusting this can affect print quality. A smaller layer height provides more detail but takes longer, while a larger height is faster but less detailed.
- Print Speed: Printing too fast can lead to shifting. Find a balance between speed and quality. Typically, slower speeds result in better-quality prints.
- Infill and Supports: These affect the print’s internal structure and stability. Too little infill can make the print weak, while too much can be wasteful. Supports ensure overhanging parts don’t droop.
- Retraction Settings: This prevents oozing when the extruder moves. Fine-tuning retraction can reduce stringing between parts of your print.
- Temperature Settings: Both the extruder and bed temperature are crucial. Ensure they’re set appropriately for your filament type. Too hot can lead to stringing, too cold might result in poor layer adhesion.
V. Troubleshooting Common Issues in Anycubic Cobra 3D Printing
To fix shifting 3D print on Anycubic Cobra and address its various challenges, it’s crucial to understand that this advanced 3D printer, like others in its class, may face issues impacting print quality and precision. For any 3D printing enthusiast or professional, becoming adept at troubleshooting is key. This skill not only conserves time and filament but also significantly improves the overall printing experience. In this article, we will explore common problems specific to the Anycubic Cobra 3D printer and offer comprehensive solutions to each, focusing on fixing shifting prints effectively.
1. Layer Adhesion Problems
- Potential Causes:
- The print bed might not be level.
- The bed or extruder temperature could be set incorrectly for the type of filament used.
- Solutions:
- Re-level the Print Bed: Ensure the bed is perfectly level for optimal adhesion.
- Adjust Temperature Settings: Different filaments require different temperature settings. Adjust these according to the filament specifications.
- Use Adhesion Aids: Applying a glue stick, hairspray, or a specialized 3D printing adhesive can significantly improve first-layer adhesion.
2. Stringing or Oozing
- Potential Causes:
- Incorrect retraction settings in your slicer software.
- The extruder temperature might be too high, causing the filament to ooze.
- Solutions:
- Adjust Retraction Settings: Fine-tune the retraction distance and speed in your slicer software.
- Optimize Extruder Temperature: Lower the temperature in small increments until stringing is minimized, without compromising print quality.
3. Warping
- Potential Causes:
- The bed temperature might be too low.
- Poor adhesion to the print bed.
- Drafts in the printing environment.
- Solutions:
- Increase Bed Temperature: A slightly higher bed temperature can improve adhesion and reduce warping.
- Apply Adhesion Helpers: Use adhesives or a brim/raft in your print setup.
- Minimize Drafts: Create an enclosure around your printer to maintain a consistent temperature and reduce the impact of drafts.
4. Incomplete Prints or Stops Mid-print
- Potential Causes:
- Power interruptions.
- Filament jams or run-outs.
- Solutions:
- Ensure Stable Power Source: Check your power connections and consider using a UPS (Uninterruptible Power Supply) for longer prints.
- Check and Replace Filament: Regularly inspect the filament for any signs of tangling or depletion, and replace it if necessary.
5. Over-extrusion
- Potential Causes:
- Incorrect filament diameter setting in the slicer.
- The flow rate setting may be too high.
- Solutions:
- Correct Filament Settings: Ensure that the filament diameter is accurately set in the slicer software.
- Adjust Flow Rate: If the print appears too thick or blobby, reduce the flow rate slightly.
VI. Maximizing Performance and Longevity of Anycubic Cobra Printers: Pro-Tips
Embarking on the adventure of 3D printing with an Anycubic Cobra printer can be thrilling. To fix shifting 3D print on Anycubic Cobra and to keep your printer functioning optimally, here are some crucial tips and suggestions. These recommendations aim not only to address immediate printing issues but also to boost the overall performance and durability of your printer. Implementing these tips ensures that you consistently achieve high-quality prints and maximize your printer’s potential.
Regular Maintenance
- Cleaning and Lubrication: Regularly clean and lubricate the moving parts of your printer. This can prevent wear and tear, and ensure smooth operation.
- Tighten Screws: Periodically check and tighten screws, as vibrations from printing can loosen them over time.
- Wear and Tear Inspection: Regularly inspect your printer for signs of wear and tear, and replace parts as necessary.
Test and Calibrate Often
- Frequent Testing: If you’re changing filaments or starting new models, it’s crucial to run test prints.
- Calibration Models: Use calibration cubes or benchmark models to fine-tune your printer settings, ensuring the best print quality.
Stay Informed
- Join Online Communities: Online forums and communities for Anycubic printer users are invaluable for staying updated on the latest tips, firmware updates, and troubleshooting advice.
- Learn from Others: Engage with other users to get help with specific issues or to share your own experiences.
Experiment with Filaments
- Diverse Materials: Different projects require different materials. Get familiar with the properties of various filaments like PLA, ABS, TPU, and PETG.
- Application-Specific Selection: Understand which material is best suited for a particular type of project.
Consider Upgrades
- Aftermarket Modifications: Upgrades such as enhanced print beds, superior nozzles, or better cooling fans can significantly boost your printer’s performance.
- Customization: Tailor your printer to your specific needs and preferences with these modifications.
Document Changes and Results
- Track Adjustments: Keep a record of any changes you make to your printer’s settings or hardware.
- Problem-Solving Tool: This documentation can be invaluable in troubleshooting if you encounter issues later.
Safety First
- Proper Placement: Ensure your printer is situated in a safe location, away from potential hazards like flammable materials.
- Enclosures: Consider using an enclosure to protect the printer from dust and drafts, and to maintain a consistent temperature.
Conclusion
In conclusion, mastering ‘How to Fix Shifting 3D Print on Anycubic Cobra’ is pivotal for every enthusiast aiming for perfect prints. By following the guidelines and troubleshooting tips provided, not only will you resolve current issues but also preempt potential ones. Dive into this comprehensive guide and ensure that every print comes out flawlessly.
FAQs
- How often should I calibrate my Anycubic Cobra?
Ideally, after every 10 prints or so. Regular calibration ensures consistent results. - Is it okay to switch filament brands?
Absolutely, but always check the recommended settings for each brand. Not all filaments are created equal! - My print shifted again after fixing. What do I do?
Don’t be disheartened. Go through the steps again and pay extra attention to any parts you might have missed. - Can software updates cause shifting?
It’s rare, but possible. Always check the update notes and see if any slicer setting adjustments are recommended. - Do I need to replace my belts regularly?
Not always, but if they appear worn out or if they’ve lost their tension, it’s a good idea to replace them.
Happy printing!
Resources
- anycubic.com
- https://www.prusa3d.com/page/prusaslicer_424/
- https://ultimaker.com/software/ultimaker-cura/


